How to Make Copies: A Step-by-Step Guide for Beginners (2026 Guide)

July 10, 2026
 2290 views
 0 comments
How to Make Copies: A Step-by-Step Guide for Beginners (2026 Guide)
Everything you need to know about using a copy machine, from platen glass basics to duplex copying, scan-to-cloud workflows, and what each page actually costs your business.
 1")
To make copies, place your original face down on the scanner glass (or load a stack face up in the automatic document feeder), press the Copy button, choose your quantity, paper size, and color or black-and-white mode, then press Start. For multi-page jobs, use the feeder and switch on duplex copying so you cut paper use roughly in half. Always check the first page before running the full batch.
Making Copies Is Simple. Doing It Well Saves Real Money.
Anyone can press a green button. But most offices still burn through paper, toner, and staff time on copies nobody ever reads. Learning how to make copies the right way takes about ten minutes, and the payback shows up on every invoice after that.
Industry estimates put average U.S. office printing somewhere around 10,000 pages per employee per year, with a meaningful share of those pages never picked up from the tray. Please treat that figure as a rough benchmark rather than gospel; the only number that matters for your office is the one from your own print audit. We can run that audit for you.
Modern copiers do far more than duplicate paper. They feed both sides of a sheet in a single pass, route scans straight to SharePoint, remember your monthly board-packet settings, and hold sensitive jobs until you badge in at the panel. Smart Technologies has been setting up these machines for Central Florida offices since 1999, and the questions we hear most are the ones answered below.
So whether your desk sits next to a small desktop all-in-one or a floor-standing Ricoh multifunction printer, the fundamentals travel. Learn them once. Use them forever.
Typical print cost reduction reported by businesses on managed print programs (figure drawn from vendor and industry surveys, not audited data; verify against your own spend before budgeting)
How to Make Copies on a Copy Machine: 8 Steps
Nearly every copier on the market follows the same rhythm. Sharp, Ricoh, Canon, Xerox, HP: the buttons move around, but the logic holds. Here is the sequence.
Step 1: Power on and let the machine warm up
Find the power button on the front or side panel and press it. Small desktop units are ready in under a minute. Larger floor-standing machines can take two or three minutes to reach fusing temperature, so start it before you need it.
Step 2: Check paper and toner before you start
Pull the tray and confirm it holds the size you want: letter, legal, or tabloid. Do not overfill past the tray line, because a packed tray is the single most common cause of a jam. Glance at the toner indicator too.
Step 3: Prepare your original
Remove staples, paperclips, and sticky notes. A single staple can score the glass or shred a roller. Flatten curled pages. And if the original has a tear or a coffee ring, it will faithfully reproduce on all forty copies.
 2")
Step 4: Position the document
You have two options. Lift the lid and lay a single page face down on the platen glass, squared against the corner arrow. Or fan a multi-page stack, square the edges, and load it face up in the automatic document feeder (ADF). Feeders on midrange office machines usually hold 50 to 100 sheets.
Step 5: Tap Copy and set your options
On a touchscreen, select Copy from the home menu. On a button panel, press the Copy hard key. Now dial in quantity with the number pad, choose color or monochrome, pick the tray, and set scale if you need to enlarge or reduce.
Step 6: Turn on duplex when the job allows it
Look for the 2-Sided icon. One-sided original to two-sided copy halves your paper immediately. Two-sided original to two-sided copy keeps the layout of the source document. This one setting is the easiest money your office will ever save.
Step 7: Press Start
The scanner head travels once across the glass, or the feeder pulls each sheet through. Copies land in the output tray within seconds on most machines rated above 25 pages per minute.
Step 8: Check the first sheet
Pull the first copy. Look for skew, faint text, missing edges, or a smudged line running down the page. Thirty seconds of checking beats reprinting a ream. Then let the rest of the batch run.
Glass or Document Feeder: Which Should You Use?
New users tend to default to the glass because it feels safer. Experienced users default to the feeder because it saves minutes on every job. Both have a place, and picking wrong costs you either time or a damaged original.
| Situation | Use the Platen Glass | Use the ADF (Feeder) |
|---|---|---|
| Single loose page | Yes, fastest option | Works, but overkill |
| Stack of 10 to 100 pages | Painfully slow | Yes, load and walk away |
| Bound book or open passport | Yes, the only safe option | No, risks tearing the spine |
| Fragile, torn, or wrinkled paper | Yes | No, high jam risk |
| Photographs or glossy stock | Yes | No, rollers can scuff |
| Two-sided originals | Manual flip each page | Yes, single-pass duplex scanning |
| Receipts and thermal paper | Yes | Risky, paper is too thin |
| ID cards and licenses | Yes, use ID Card Copy mode | No |
Notice the pattern? Anything thick, thin, fragile, or bound belongs on the glass. Everything else belongs in the feeder. And if a feeder jams more than once on ordinary paper, the pickup rollers are worn and a technician should look at it.
Settings That Separate a Clean Copy From a Muddy One
Most copiers ship with defaults tuned for ordinary text on white paper. Push a contract, a photograph, or a faded fax through those same defaults and the result disappoints. A few adjustments fix it.
 3")
- Resolution. Text copies fine at 300 dpi. Move to 600 dpi for photographs, fine print, or engineering drawings. Anything above 600 dpi rarely shows at reading distance and slows the job.
- Density (darkness). Nudge one notch darker for faded originals or pencil. Nudge one notch lighter for receipts, newsprint, and thermal paper, which tend to bleed and gray the background.
- Color mode. Grayscale reproduces shades of black without touching the cyan, magenta, and yellow cartridges. Your toner budget will notice.
- Reduce and enlarge. Most office machines scale from 25 percent to 400 percent. Use 2-in-1 or 4-in-1 layout to fit multiple pages on one sheet for reference copies.
- Background removal. Buried in the copy menu on most Ricoh and Sharp panels, this setting drops out the gray cast from colored or aged paper.
- Sort, group, staple. If a finisher is attached, a 40-page handout for 25 attendees comes out collated and stapled without anyone touching it.
Try the settings once on a single test copy. Save the combination as a preset. Then a job that took four minutes of fiddling becomes one tap next month.
Copy, Scan, or Both? Knowing the Difference
Copying produces paper. Scanning produces a file. Every modern multifunction printer does both, and choosing the digital path often makes more sense than reaching for the Start button.
 4")
Scanned documents get stored, searched, emailed, and versioned. Paper copies get lost. When a client asks for last year’s invoice, a searchable PDF answers in four seconds; a filing cabinet answers in twenty minutes. Our post on optical character recognition and business workflow walks through how scanned images become searchable text.
Common scan destinations on a current office machine include email, a network folder, USB, SharePoint, Google Drive, Dropbox, and Box. Setting these up takes a technician about an hour for the whole fleet. After that, staff tap a button labeled with a department name and the file lands where it belongs.
So before you copy a 60-page contract for three people, ask whether a scan-to-email would serve everyone better. Usually it would.
 5")
Copying from your computer works too. Open the document, press Ctrl+P on Windows or Command+P on Mac, choose the office printer, set copies and duplex in the print dialog, and send it. No scanning step, no glass to clean, and the output is sharper because it never passed through a scanner.
How much more a color page typically costs than a black-and-white page on an office copier, based on 2026 industry pricing guides (roughly $0.01 to $0.015 mono versus $0.06 to $0.12 color; confirm rates in your own service contract)
What Does It Actually Cost to Make Copies?
Cost per copy is one of the most misread lines in an office budget. Hardware is a slice. Paper is a slice. The rest hides in toner, drum kits, fuser assemblies, electricity, service calls, and the twenty minutes a staffer spends clearing a jam.
Published 2026 pricing guides put a black-and-white page on a leased office copier somewhere near one to one and a half cents, all in. Color pages usually land between six and twelve cents. Those are ranges, not promises, and your speed class, volume commitment, and coverage percentage all move the number. We recommend pulling your last three invoices and dividing by your meter reads.
Run the arithmetic on a 25-person Daytona Beach office printing 10,000 pages per person per year. At a penny a page, mono printing costs about $2,500 annually. Push a quarter of those pages to color at nine cents and the same office adds roughly $5,600. The gap is not trivial, and almost none of it appears on the copier lease invoice.
| Cost Component | Desktop Inkjet All-in-One | Office Laser MFP (Leased) |
|---|---|---|
| Device cost | $150 to $500 purchase | $95 to $600 per month lease |
| Mono cost per page | $0.03 to $0.08 | $0.01 to $0.015 |
| Color cost per page | $0.15 to $0.30 | $0.06 to $0.12 |
| Speed (pages per minute) | 8 to 20 | 25 to 75 |
| Feeder capacity | 0 to 35 sheets | 50 to 300 sheets |
| Duplex copying | Often manual | Standard, single pass |
| Service and supplies | You buy and install | Usually bundled in contract |
| Best fit | 1 to 3 users, low volume | 5 to 100+ users |
An honest caveat: leasing is not automatically cheaper. A two-person office printing 300 pages a month will never recover a monthly lease payment, and a cheap laser printer serves them better. The break-even usually appears somewhere between 1,500 and 2,500 pages per month, though the exact point depends on your color mix. Our breakdown of copier lease cost and hidden fees covers the fine print worth reading before you sign anything.
Volume aside, a managed copier leasing program bundles service, toner, and parts into one predictable monthly line. Vendor surveys commonly claim 30 to 50 percent savings against unmanaged printing. Those surveys come from companies selling the service, so read them with appropriate skepticism; the savings are real for most mid-size offices, but the top of that range assumes a badly run print environment to begin with.
Six Copying Habits That Quietly Save Thousands
- Set duplex as the device default. Almost nobody changes a default. One configuration change at the panel cuts paper consumption on long documents by close to half, permanently.
- Build job presets. Ricoh, Sharp, and Canon panels all support one-touch saved settings. Your monthly board packet becomes a single button instead of six menu taps.
- Enable secure print release. A PIN, badge, or phone tap holds the job until the right person stands at the machine. Abandoned print jobs drop to near zero, and HR paperwork stops sitting in the output tray.
- Restrict color by role. Marketing and client-facing staff get color. Internal memos run mono. This is the single largest lever on print spend in most offices.
- Preview before you commit. A two-second preview stops a 200-page mistake. Every panel has one.
- Post a cheat sheet on the machine. How to clear a jam, how to load paper, where the toner lives, who to call. Institutional knowledge should not walk out the door with one employee.
None of these require new hardware. All of them take a technician under an hour to configure across a fleet, and Smart Technologies includes this tuning in every managed print agreement across Central Florida.
Common Copy Machine Problems and Quick Fixes
Even a well-maintained copier misbehaves. So here are the failures we see most often on service calls in Daytona Beach and Orlando, along with the first thing to try.
- A dark line runs down every copy. A speck of dust or dried correction fluid sits on the scanner glass or the narrow ADF scan strip. Wipe both with a microfiber cloth and a drop of isopropyl alcohol. This fixes it perhaps eight times out of ten.
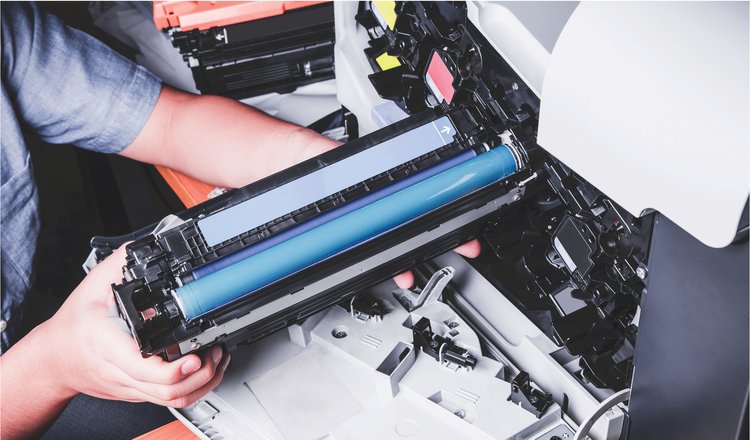
- Copies come out faint. Increase density one notch. If nothing improves, shake the toner cartridge gently and reseat it. Still faint? The drum unit is likely near end of life.
- Blank pages. Toner is empty, or the original went face up on the glass. Check both before calling anyone.
- Repeated ADF jams. Fan the stack, square the edges, and confirm you are under the rated sheet capacity. Persistent jams on clean paper point at worn pickup rollers, which are a routine, inexpensive replacement.
- Skewed or crooked copies. Square the original against the corner guide, or snug the ADF side guides against the stack without pinching it.
- Wrong paper size. The tray setting and the loaded paper disagree. Reconfigure the tray in the device settings, not just in the print dialog.
- Ghost images repeating down the page. The drum or fuser is failing. Stop and call service; running it further can damage the machine.
- Slow first copy. Sleep and eco modes extend warm-up. Adjust the sleep timer if the machine sits idle between busy periods.
Toner handling deserves a word of its own. Waste toner containers fill up quietly and then stop the machine mid-job. Our guide to waste toner container management explains the replacement cadence and why tipping a full one ends badly.
Copying Sustainably Without Slowing Anyone Down
Sustainability and cost control point the same direction here, which is convenient. Paper is the biggest lever, and duplex is the whole answer. Default to two-sided and paper volume falls sharply on day one.
Electricity matters less than most people assume, but it is not nothing. The Energy Star imaging equipment program certifies copiers and multifunction printers meeting federal efficiency criteria, particularly in idle and sleep states, where office machines spend the overwhelming majority of their lives. Choosing a certified model costs no more than an uncertified one.
Recycled paper with 30 percent post-consumer content runs cleanly through every modern office copier we service. Jam rates are indistinguishable from virgin stock. Price is roughly comparable. Manufacturers including Ricoh and Xerox operate free cartridge return programs, and our technicians collect empties during routine Central Florida service visits at no charge.
One honest limitation: recycled paper with higher post-consumer content, above roughly 50 percent, does show slightly more paper dust in high-volume machines. Talk to your service provider before standardizing on it fleet-wide.
The Copier Is a Computer. Treat It Like One.
Every networked multifunction printer contains a hard drive or solid-state storage, an operating system, and an open network port. Scanned tax returns, HR files, and signed contracts pass through that storage. Many machines retain images long after the job finishes.
The National Institute of Standards and Technology has published guidance on securing multifunction devices, and the practical checklist is short. Change the default administrator password. Enable data overwrite and drive encryption. Require authentication for scan-to-email. Keep firmware current. Wipe or physically destroy the drive before any device leaves your building at lease end.
That last item trips up more Florida businesses than any other. A copier returned at lease end carries away years of scanned documents unless someone sanitizes the drive. Ask your provider for written confirmation. Smart Technologies performs a certified data wipe on every returned unit and documents it, and our guide to reducing print network vulnerabilities covers the broader fleet hardening steps.
Copier Features Your Office Is Probably Not Using
Machines built after roughly 2021 include capabilities that were expensive add-ons a decade ago. If your copier predates that, you are likely paying maintenance on a worse experience than a current model delivers.
Single-pass duplex scanning
Two scan heads capture both sides of a page in one trip through the feeder. A 100-page double-sided original scans in well under a minute on a 70 page-per-minute machine.
ID Card Copy mode
Place a driver license face down, scan, flip it, scan again. Both sides appear on one sheet, correctly oriented. Front desks and HR use this constantly and half of them do not know it exists.
Optical character recognition
Scans become searchable, selectable PDF text instead of flat images. Your accounting team finds an invoice by vendor name in seconds.
Mobile print and release
Staff send a job from a phone, then release it at whichever device they walk past. Useful for hybrid teams and satellite offices.
Cloud connectors
Native buttons for Microsoft 365, Google Drive, Dropbox, and Box. A scan lands in the correct SharePoint library with one tap and no desktop involved.
Rules-based routing
Invoices scanned at the panel can be automatically named, indexed, and dropped into an accounts payable folder. This edges into full business process automation, which is where the real time savings live.
Missing three or more of these? A refresh usually pays for itself inside the lease term. Our overview of what a multifunction printer does compares the feature sets across the main manufacturers.
How Smart Technologies Helps Central Florida Offices Copy Smarter
Free Print Audit
We meter your actual pages, devices, and supply spend, then model the savings before you commit to anything.
Right-Sized Fleet
We match machines to real volume. You stop paying for speed classes and capacity nobody uses.
Onsite Setup
Delivery, installation, network configuration, and hands-on staff training across Daytona Beach, Orlando, and Volusia County.
Managed Supplies
Toner and consumables ship automatically before they run out. Nobody hunts for a cartridge mid-job.
Local Service
Florida-based technicians, not a national call center. Most service calls in our territory get same-day or next-day response.
Secure Workflows
Scan-to-cloud, badge release, drive encryption, and certified data wipe at lease end, documented in writing.
Volusia County keeps adding businesses, and the county economic development office now runs incubator and acceleration programs feeding new offices into the region every quarter. Those offices need printing that works on day one. Smart Technologies of Florida has served that market from Daytona Beach since 1999.
Frequently Asked Questions About Making Copies
1. What is the fastest way to make copies of a multi-page document?
Load the stack face up in the automatic document feeder, set your options once, and press Start. A 30-page job finishes in about a minute on a 30 page-per-minute machine, and you never touch the glass.
2. Can I make double-sided copies from single-sided originals?
Yes. Choose the 1-sided to 2-sided option in the copy menu. The machine pairs pages automatically and prints on both faces of each sheet.
3. How do I copy both sides of an ID card onto one page?
Use ID Card Copy mode. Place the card face down on the glass, scan, flip it over, and scan again. Both images print on a single sheet at actual size.
4. Why are my copies streaked or blurry?
Dust or dried fluid on the scanner glass or the ADF scan strip causes most streaks. Clean both with a microfiber cloth and isopropyl alcohol. If the streak survives cleaning, the drum unit probably needs replacement.
5. How much does it cost to make a copy?
On a leased office copier, roughly one to one and a half cents per black-and-white page and six to twelve cents per color page in 2026, according to published industry pricing guides. Your actual contract rate may differ, so check your invoice against your meter reads.
6. What is the difference between copying and scanning?
Copying produces a paper duplicate. Scanning produces a digital file, usually a PDF, sent to email, a network folder, or cloud storage. Multifunction printers do both from the same glass.
7. Can I copy a book, passport, or thick document?
Yes, but only on the platen glass. Never feed bound material through the ADF. Lay the item face down, close the lid gently, and press lightly if the pages will not sit flat.
8. How long does an office copier last?
A commercial machine under regular service typically runs five to seven years. Lease terms of 36, 48, or 60 months exist partly to keep hardware retired before repair costs climb. Our post on how long a printer lasts goes deeper.
9. Do I still need a separate scanner if I have a copier?
Almost certainly not. Any current multifunction printer scans to email, network folders, USB, and the major cloud drives. Dedicated scanners now serve specialty needs like large format or high-speed batch capture.
10. Are color copies always more expensive?
Yes, and the gap is wide. Color pages typically cost five to ten times what mono pages cost, because four toner cartridges deplete instead of one and per-page yields drop. Reserve color for client-facing material.
11. Why does my copier jam so often?
Overfilled trays, humid paper, worn pickup rollers, or staples left in originals cause the overwhelming majority of jams. Florida humidity is a real factor; store paper sealed and away from exterior walls.
12. Is it legal to copy copyrighted material?
Limited copying may fall under fair use for education, commentary, or research, but the boundaries are narrow and fact-specific. We are not lawyers. Consult a legal professional before reproducing protected work at scale.
13. What paper weight works best for copying?
Standard 20 pound (75 gsm) paper handles daily copying. Step up to 28 pound (105 gsm) for brochures and presentation handouts. Check your machine’s rated media range before running anything heavier.
14. Where can I lease a copier in Daytona Beach or Orlando?
Smart Technologies of Florida serves Daytona Beach, Orlando, Volusia County, and the surrounding Central Florida region. Call (386) 252-2292 or request a free print assessment through our managed IT and office technology page.
Get a Free Print Assessment
Smart Technologies has served Daytona Beach, Orlando, and Central Florida as a Business Transformation Agency since 1999. Let us meter your fleet, cut the waste, and configure the settings your team never had time to find.
771 Fentress Blvd Suite 10, Daytona Beach, FL 32114
Related Posts
— Benefits of Collating When Printing Multiple Pages (2026 Guide)
— Privacy & Managed Print: 5 Reasons to Implement a Managed Print Solution in Your Office (2026 Guide)