Why a Laser Printer Maintenance Checklist Is Essential for Your Business
A good laser printer maintenance checklist isn’t just about keeping your printer clean. It’s about saving money, ensuring top-notch print quality, and preventing disruptions in your daily operations.
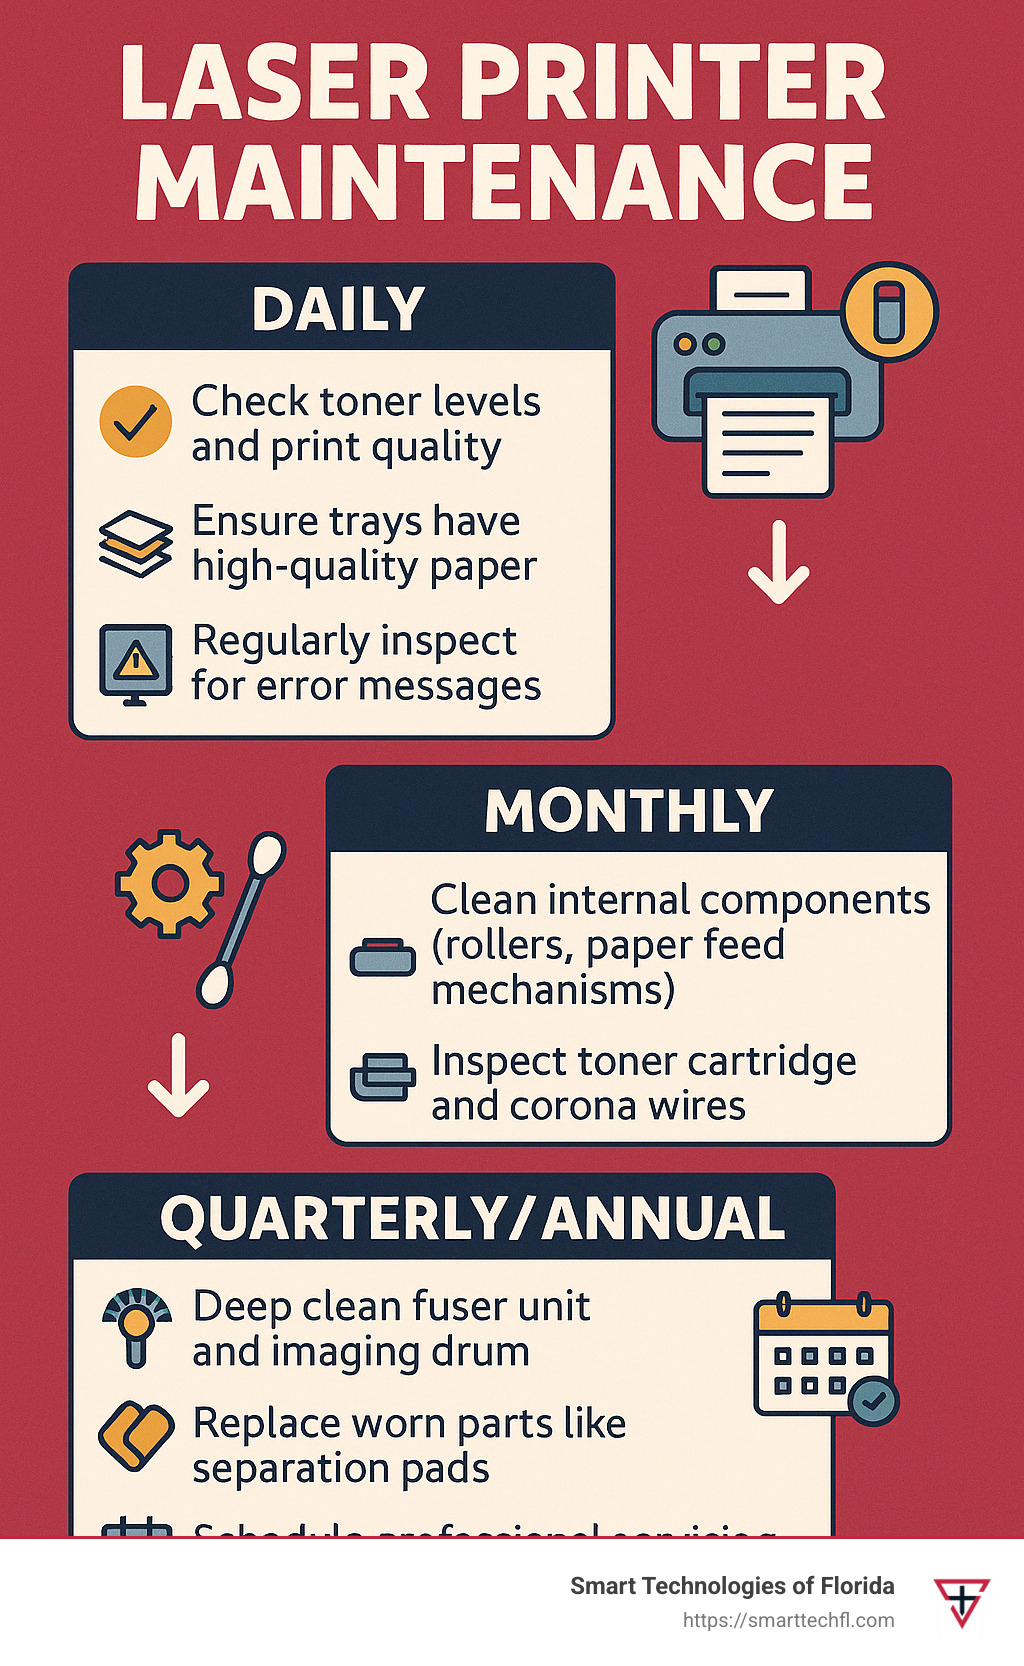
If you just need a quick laser printer maintenance checklist, here it is at a glance:
- Daily/weekly
- Check toner levels and print quality
- Ensure trays have high-quality paper
- Regularly inspect for error messages
- Monthly
- Clean internal components (rollers, paper feed mechanisms)
- Inspect toner cartridge and corona wires
- Quarterly/Annual
- Deep clean fuser unit and imaging drum
- Replace worn parts like separation pads
- Schedule professional servicing
Sticking to regular laser printer maintenance means fewer jams, streaks, and malfunctions. As an insightful comparison goes:
“Just like a car, a printer requires constant maintenance for it to run smoothly.”
Here’s a helpful infographic summarizing an effective laser printer maintenance schedule:
Why Regular Laser Printer Maintenance is Essential
Laser printers are like the unsung heroes of your office—they tirelessly print thousands of pages without a complaint. But even heroes need a little TLC. Without a solid laser printer maintenance checklist, your reliable printer can quickly turn into a productivity nightmare, causing downtime, poor print quality, and higher costs.
At Smart Technologies of Florida, we’ve worked closely with businesses and seen how regular maintenance directly boosts printer longevity. The average lifespan of a laser printer is typically between 3 to 7 years, but with consistent care, many printers can serve you well beyond these expectations. (Curious about printer lifespans? Check out our article How Long Do Printers Last?)
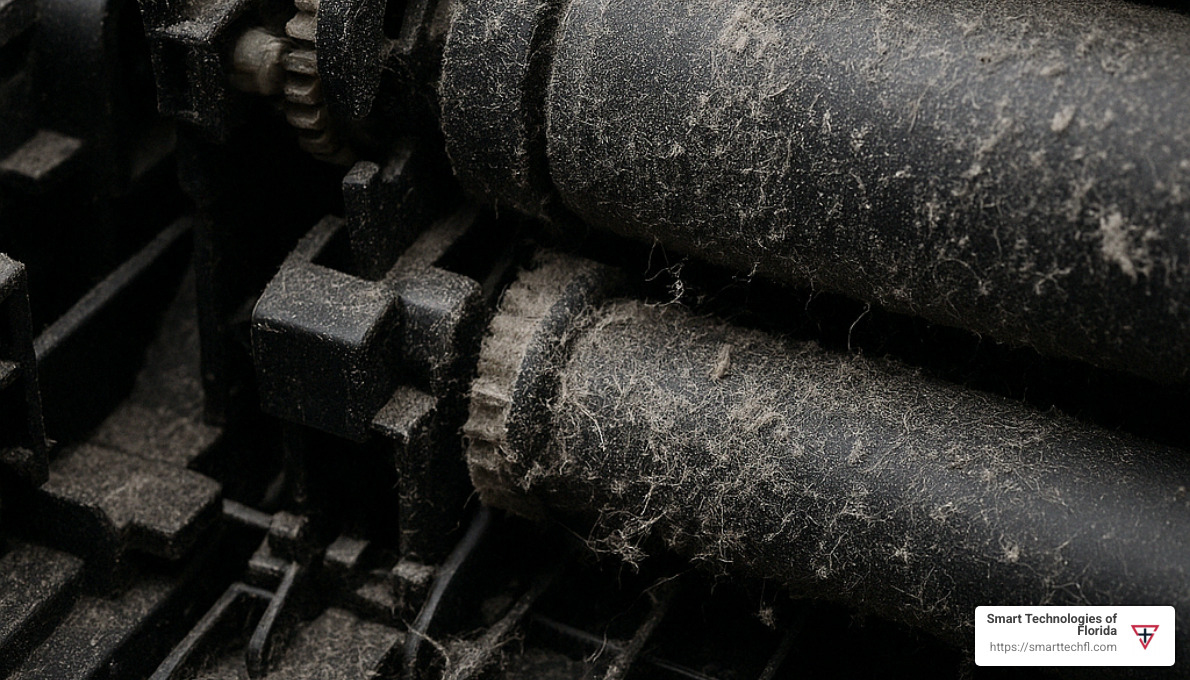
Every page you print leaves behind tiny bits of paper fibers, toner particles, and dust. Over time, these small deposits build up and cause headaches—like frequent paper jams, streaky documents, or even complete component failure. Just imagine each sheet whispering, “I’ll be back,” as it leaves behind microscopic debris. Regular maintenance is your best defense, preventing accumulation and keeping the printer running smoothly.
Beyond just cleanliness, preventative maintenance lets you spot minor issues before they snowball into big emergencies. It’s much cheaper—and far less stressful—to clean rollers or change a worn part during scheduled maintenance than to face costly repairs or sudden breakdowns. (Want more insights into preventative maintenance? Here’s a handy resource: Preventative maintenance)
The Impact of Maintenance on Printer Performance and Longevity
There’s a clear difference between printers that are regularly maintained and those that are neglected. Regular maintenance doesn’t just prevent problems; it actively improves printer performance and lifespan.
Consistent cleaning keeps toner and dust from building up—resulting in sharper, clearer documents without those dreaded streaks or faded spots. Clean printers perform at their rated speed, allowing your team to print faster and more efficiently.
Ever had a paper jam when you’re rushing to meet a deadline? Regularly cleaned rollers and paper paths dramatically reduce jam frequency, eliminating a major source of office frustration. Plus, by maintaining your printer, you’ll find your toner cartridges last longer and your printer breaks down less often—saving you money in operating costs and repair bills. (Learn more about office printer maintenance costs here: Office Printer Maintenance Costs)
Printing industry expert Sophie Sirois sums it up nicely: “Proper maintenance is essential for maximizing your printer’s lifespan and ensuring reliable performance.”
At Smart Technologies of Florida, we’ve witnessed companies dramatically extending their laser printers’ lifespans through structured maintenance routines. In fact, one of our Daytona Beach clients kept their printers running smoothly for nearly 10 years—well beyond manufacturer expectations—simply by following a customized laser printer maintenance checklist we provided.
Common Issues Prevented by Regular Maintenance
Most printer problems are predictable and avoidable. Regular care can help you dodge some of the most common headaches, ensuring your printer stays productive instead of becoming a source of constant stress.
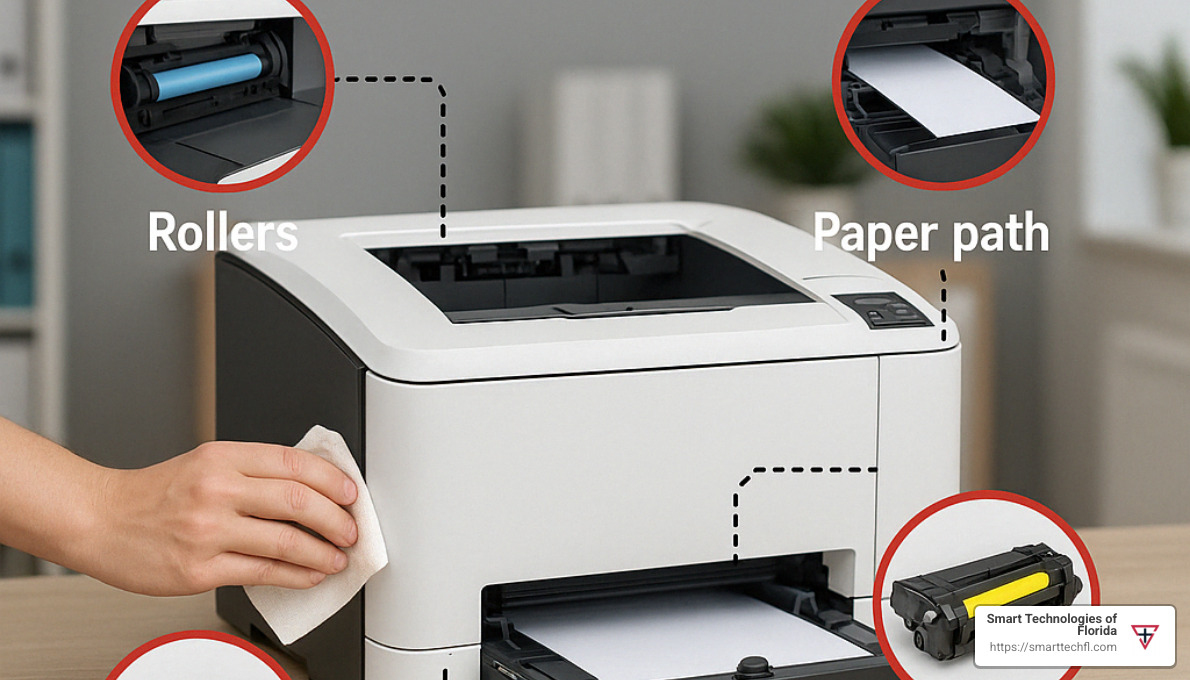
Take paper jams, for instance. These usually happen because of dirty or worn rollers that struggle to feed paper properly. Simply cleaning these rollers and paper paths regularly will help eliminate most jams. (For more tips, see our guide: Printer Jam Causes and Solutions)
Streaking and toner smears often indicate dirty corona wires or buildup inside the printer. Cleaning internal components monthly keeps printouts crisp and professional-looking. Similarly, ghosting (faint repeated images) usually points to issues with the imaging drum or fuser unit—regular inspections help catch these problems early.
Finally, consistent maintenance prevents hardware wear. Dirty components cause extra friction on moving parts, hastening their failure. By keeping parts clean and lubricated, you’ll extend their useful life significantly and avoid unexpected replacements.
One of our clients from a busy accounting office reached out after frequent paper jams were disrupting their workflow. After adopting our recommended laser printer maintenance checklist, they saw a remarkable 90% decrease in jams—plus a noticeable improvement in print quality, all within just one month!
Essential Tools and Materials for Laser Printer Maintenance
When it comes to maintaining your laser printer, having the right tools within easy reach can make all the difference. Not only does this simplify the task, but it also ensures you’re protecting sensitive printer components from damage.
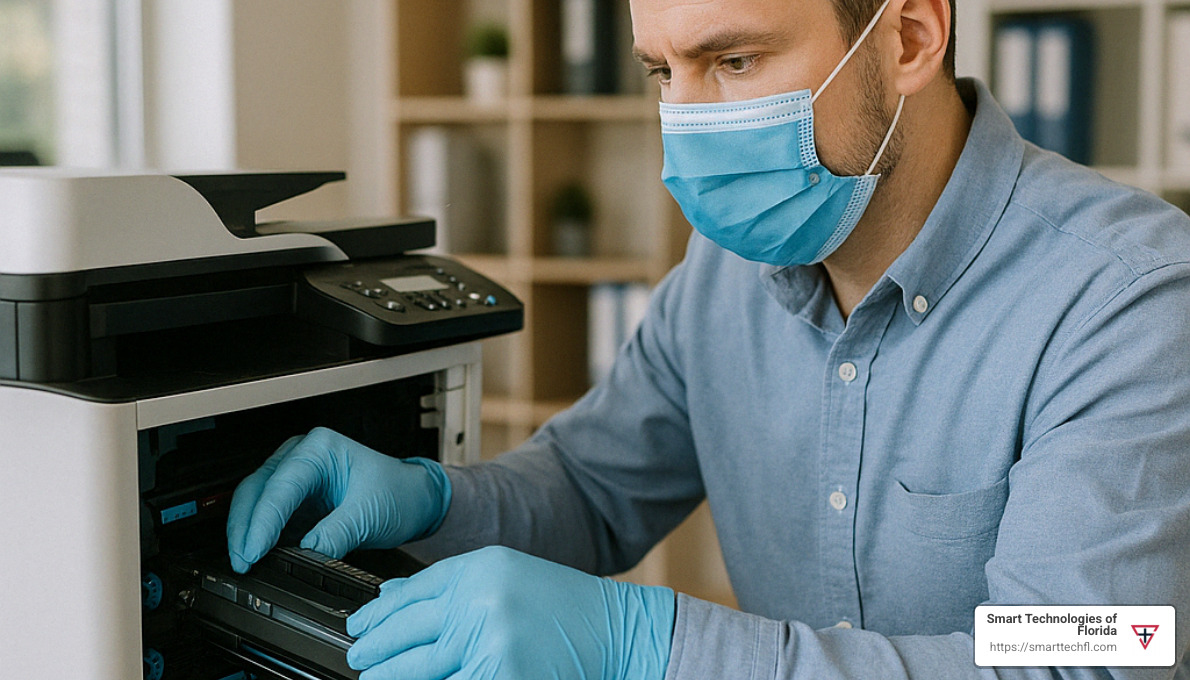
First things first—let’s talk about safety. Toner particles are incredibly fine and can easily become airborne, so always wear proper protective gear. A simple face mask and a pair of latex or nitrile gloves will keep toner off your skin and out of your lungs (trust us, toner particles aren’t exactly a nutritious snack).
For cleaning surfaces and components, lint-free cloths are your best friends. They won’t leave fibers behind that could potentially cause problems later. Pair them with a bottle of isopropyl alcohol (70%) for gently cleaning rollers and other internal parts. Cotton swabs are also great for reaching small, tight spaces that a cloth can’t quite handle.
When you’re dealing with dust buildup, especially in hard-to-reach places, a quick burst from a compressed air canister does wonders—but keep the bursts short and controlled. If you’re really serious about keeping things spotless, invest in a specialized toner vacuum that safely collects toner particles without redistributing them into the air (or your office carpet).
Many components benefit from the gentle touch of a soft paintbrush. Choose one that’s about half an inch wide with soft bristles to brush away dust from sensitive internal parts. To keep your printer running smoothly, also make sure to use manufacturer-recommended cleaning sheets—they’re specially designed to clear dust and debris from internal paper paths.
Speaking of manufacturer recommendations, don’t skimp on toner cartridges or paper. Cheap toner might seem like an easy way to cut costs, but it often causes more problems than savings. Genuine, high-quality manufacturer-recommended ink cartridges and quality paper will help avoid malfunctions, print quality issues, and headaches down the road.
At Smart Technologies of Florida, we’ve helped many clients recognize significant long-term benefits simply by choosing quality maintenance supplies. Trust us, investing in these materials pays off in fewer repairs, better print quality, and a longer-lasting printer.
Safety Precautions Before Starting Maintenance
Before diving into printer maintenance, safety should always come first. Laser printers contain components that can be hot, pose electrical risks, and contain fine toner particles (remember, toner doesn’t make good seasoning).
Always begin by powering off and unplugging your printer. Give it at least an hour to cool down—it’s better to wait and brew yourself a nice cup of coffee than risk getting burned. In fact, printer manufacturers advise clearly:
“Leave the printer unplugged for at least 1 hour prior to cleaning.”
Next, suit up with your protective gear—mask and gloves—to keep toner away from your skin and lungs. Work in a well-ventilated area to avoid breathing in airborne particles.
Handle toner cartridges with care. Avoid shaking or turning them upside down to prevent messy leaks. A quick tip: place cartridges on a disposable piece of paper when they’re out of the printer—it’s a simple way to keep your workspace clean.
Static electricity can harm sensitive printer components, so discharge any static by touching a grounded metal surface before reaching inside. Also, remember to keep your fingers away from the fuser roller. It’s designed to heat up to very high temperatures, and even after turning off your printer, it can stay hot for quite some time.
Finally, make sure to avoid direct exposure of the imaging drum to bright light. The drum is highly sensitive and can be damaged quickly if exposed to strong lighting or direct sunlight.
By following these simple precautions, you’ll ensure a safe, effective maintenance session. And if you ever feel unsure, don’t hesitate to consult your printer’s manual or reach out to experienced professionals like our friendly team at Smart Technologies of Florida.
Comprehensive Laser Printer Maintenance Checklist
A structured approach to maintaining your laser printer doesn’t have to be complicated. In fact, having a clear, step-by-step laser printer maintenance checklist can save you time and headaches, while also maximizing your printer’s lifespan and performance.
At Smart Technologies of Florida, we’ve found that breaking down maintenance tasks by frequency makes the process simple and easy to follow. Let’s dive into our proven routine!
Daily and Weekly Maintenance Tasks
Daily and weekly check-ups are quick, simple, and can be effortlessly incorporated into your daily office routine. Think of them like brushing your teeth—just a couple of minutes each day can keep major issues away.
Every day, start with a quick visual inspection. Look for signs of paper jams, error messages, and feel if the printer makes unusual noises, which could signal something isn’t quite right. Checking your toner levels daily helps you order replacements before you run out, avoiding frustrating downtime. Also, glance over a recent printout to confirm there’s no streaking, spotting, or fading.
Don’t forget a quick external cleaning with a dry, lint-free cloth each day to keep dust away. While you’re at it, peek into the paper trays; make sure paper isn’t curled or warped from humidity and is loaded properly.
On a weekly basis, spend a few extra minutes for a deeper exterior clean. Use a slightly damp, lint-free cloth to clean all external surfaces, but don’t go overboard—remember your printer doesn’t like showers! Gently wipe the control panel to remove fingerprints and grime.
Once a week, visually inspect the paper path for stray paper debris and ensure stored paper remains high-quality and dry. Reviewing the printer’s error log weekly also helps catch any recurring messages that might signal a developing issue.
One of our Daytona Beach clients assigned these daily and weekly maintenance checks to different team members each week. It became a fun, quick morning routine for them, significantly cutting down unexpected downtime and boosting print quality.
Monthly Laser Printer Maintenance Procedures
Monthly maintenance goes deeper, keeping crucial internal printer parts clean and working smoothly. Before you begin, always switch off and unplug your printer, and let it rest (we suggest at least one hour to fully cool down).
Begin by carefully opening your printer according to the manufacturer’s instructions. Remove the toner cartridge gently (no shaking!), placing it on disposable paper. Now, with your lint-free cloth, gently clean accessible internal surfaces. Use your trusty soft brush to remove dust from nooks and crannies.
Next, tackle the rollers—the rubber wheels that feed paper. If they look clean, a damp cloth is enough. But if they’re glazing or slippery, dab them gently with a cloth dampened with 70% isopropyl alcohol, allowing them to dry fully before reassembling.
Inspect and carefully clean the corona wire, a delicate thin wire that helps your printer apply toner correctly to the paper. Use a cotton swab dipped lightly in isopropyl alcohol, treating the wire gently—like it’s made of glass.
Give the toner cartridge a once-over to check for leaks or damage. Carefully rock (not shake!) it to redistribute toner evenly. Check remaining toner levels and replace if needed.
Don’t forget the paper feed mechanisms—remove the paper trays and clean them thoroughly with a lint-free cloth. Look out for damage or unusual wear.
Finish your monthly maintenance by running a built-in printer cleaning cycle, printing a test page, and performing firmware updates from your printer manufacturer’s website.
Experts agree: “Maintenance procedures for a laser printer should be performed on a monthly basis. These steps not only prevent issues but can help solve printing problems like streaking, toner smears, and gaps in printing.”
For detailed guidance, check out HP’s guide on cleaning paper feed rollers.
Quarterly and Annual Deep Cleaning
Quarterly and annual deep cleaning tasks are your chance for an even more thorough checkup. Think of it as your printer’s annual physical!
Every three months, do an in-depth component wear assessment. Inspect belts, gears, and listen closely for unusual noises when the printer works. Checking that everything moves smoothly now will avoid headaches later.
Next, give special attention to the fuser unit—it handles heat and toner like a champ, but it can get dirty or worn. Check for toner buildup and gently clean it according to your manufacturer’s guidelines. This is also the ideal time to perform comprehensive internal cleaning, using manufacturer-recommended cleaning sheets to clear out hidden debris.
Also, don’t overlook the waste toner container. Inspecting and emptying or replacing it quarterly helps avoid messy spills and annoying error messages. For more details, see our guide on Waste Toner Container Management.
Once a year, it’s time for some extra TLC. Check and replace the separation pads if they’re worn—generally recommended after about 50,000-100,000 pages printed. Most importantly, consider scheduling professional servicing annually to give your printer expert care. Qualified technicians (like our team at Smart Technologies of Florida) will thoroughly clean internal components, replace worn parts proactively, and ensure your printer runs smoothly.
An annual complete system assessment is also wise. Evaluate your printer’s overall condition, consider its age and maintenance costs, and decide if continuing maintenance makes sense or if replacement is a better investment. Our clients who added professional servicing to their maintenance routines saw repair costs drop by as much as 67% year over year!
Following this comprehensive laser printer maintenance checklist may seem like a lot, but it quickly becomes second nature—kind of like changing the oil in your car. And just like regular oil changes, consistent printer maintenance saves you money and headaches down the line.
Specific Component Maintenance Guidelines
Understanding how each printer component works—and how to care for it properly—is crucial to getting the most out of your laser printer. Each part has unique maintenance needs, but don’t worry—it’s simpler than it sounds. Let’s walk through the key components step by step, keeping your trusty printer humming along smoothly and extending its life.

Toner Cartridge Care and Replacement
Think of the toner cartridge as the heart of your laser printer—it’s responsible for creating the images and text you see on paper. Taking good care of it ensures crisp, clear prints and prolongs your printer’s life.
Always handle toner cartridges gently. Avoid shaking them vigorously—just a gentle rocking motion is enough to redistribute toner evenly. Keep cartridges sealed in their protective bags until you’re ready to install them. Direct sunlight and extreme heat or cold can damage the toner, so keep them out of hot cars or sunny windowsills.
When storing replacement cartridges, choose a cool, dry place (ideally between 59-77°F). Lay them flat in their original packaging—the same position they’d be in the printer. This helps prevent uneven toner distribution or leaks.
Don’t wait until your prints look faded or streaky to replace the cartridge. Follow the printer’s warnings and replace cartridges promptly when toner gets low. Running completely empty cartridges can actually harm your printer, causing unnecessary wear on internal parts.
And here’s an eco-friendly tip: Always recycle your used cartridges through manufacturer programs or reputable recycling services. Avoid tossing cartridges in the regular trash—they contain chemicals and plastics that aren’t great for the environment.
At Smart Technologies of Florida, we strongly recommend using genuine toner cartridges or high-quality, manufacturer-approved alternatives. Bargain brands might save money initially, but often lead to more maintenance problems and higher costs down the road.
You can learn more about toner management in our guide on How to Empty Waste Toner Box or answer common questions like Do Laser Printers Need Ink?.
Cleaning and Maintaining the Imaging Drum
The imaging drum (sometimes called the OPC drum) is the sensitive component responsible for transferring toner onto paper. Just like camera film, this drum is sensitive to bright lights—so always minimize exposure to strong sunlight or office lighting when handling it.
When handling the imaging drum, gently hold it by the ends or provided handles. Never touch the green or blue drum surface with your bare fingers—even small fingerprints can cause permanent print quality issues. If you need to set it down outside the printer, lay it gently on clean paper or a lint-free cloth.
Cleaning the imaging drum should be done very carefully, and only if absolutely needed. If toner or dust buildup requires cleanup, use a soft, lint-free cloth—never use alcohol, solvents, or harsh cleaners unless specifically recommended by your printer manufacturer.
Some laser printers combine the imaging drum with the toner cartridge—meaning they get replaced at the same time. Others have separate drums, typically needing replacement after 10,000 to 50,000 pages. Watch for signs like repeated streaks, ghosting images, or inconsistent quality—these indicate it might be time to replace the drum. For more detailed info, check out our imaging drum guide.
Fuser Unit and Corona Wire Maintenance
The fuser unit and corona wires might sound complicated, but they’re easier to understand than you’d expect—and they’re critical for print quality. The fuser applies heat and pressure to permanently bond toner onto paper, while corona wires generate the electrical charges necessary for toner transfer.
Because the fuser gets extremely hot during operation (up to 400°F!), always allow your printer to cool down for at least one full hour before performing any fuser maintenance. Once cooled, inspect for paper debris or toner buildup. Follow your manufacturer’s maintenance guidelines carefully, cleaning gently with recommended tools like a lint-free cloth or cotton swabs lightly moistened with isopropyl alcohol.
Corona wires are delicate, thin wires that need gentle handling during cleaning. To clean, use the provided cleaning tool (if your printer comes with one) or carefully wipe along the wire’s length with a cotton swab dipped in isopropyl alcohol. Be very gentle—too much pressure can damage these wires. Also, if your printer has a corona wire grid, gently clean it with a dry cotton swab to remove excess toner and dust.
Regularly inspecting the fuser unit helps you spot tell-tale signs of wear. If you’re consistently noticing smudging, toner streaks, or curling paper, your fuser might need professional attention or replacement. Typically, printer manufacturers recommend replacing the fuser unit after about 100,000 printed pages.
At Smart Technologies of Florida, we once helped a client who struggled with ongoing paper curling and smudges. It turned out their fuser unit just needed a professional cleaning rather than a full replacement—saving them significant costs and hassle.
To help you budget and prepare for maintenance costs, read our comprehensive article on Laser Printer Maintenance Costs Explained.
Taking care of these specific printer components is essential to your regular laser printer maintenance checklist. By giving each part a little extra attention, your printer will reward you with reliable, high-quality performance for years to come.
Troubleshooting Common Laser Printer Issues
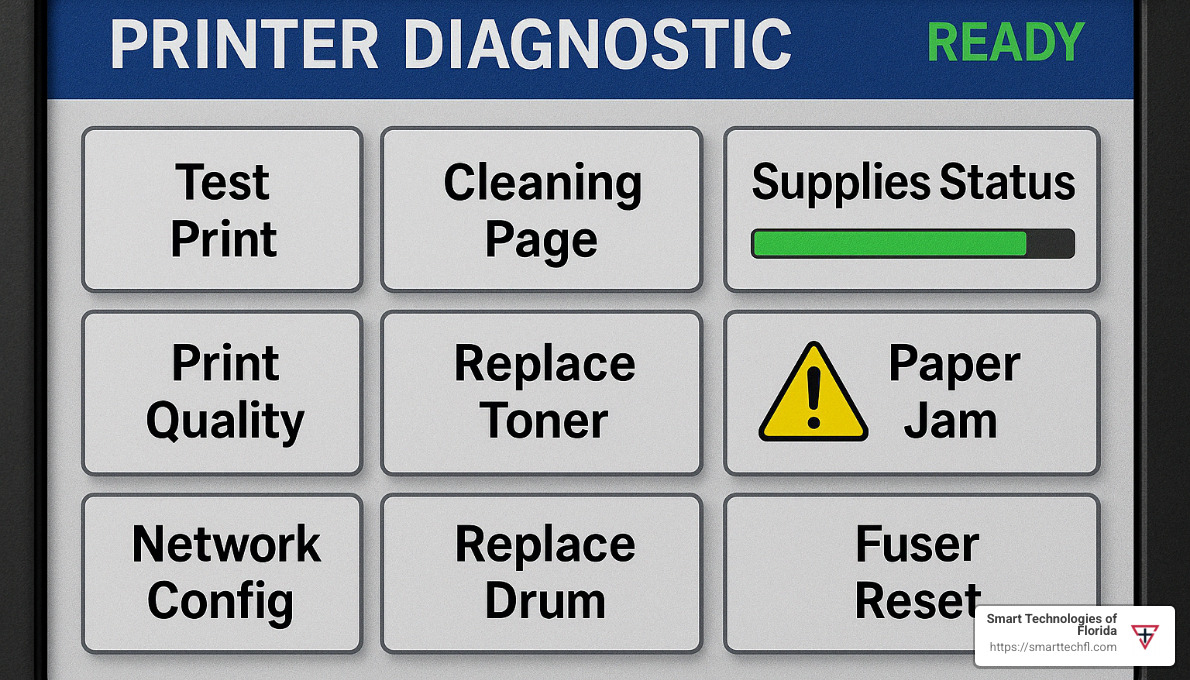
Even with the most thorough laser printer maintenance checklist, occasional hiccups can still happen. Printers, like people, sometimes have off days. But knowing how to spot and fix common printer issues yourself can help you avoid unnecessary downtime and costly service calls. Let’s walk through some typical problems and their solutions together.
Diagnosing Print Quality Problems
Print quality problems are frequently the first sign your printer needs extra attention. Here are some common issues and how you can address them:
Streaking or Lines: If you start seeing unwanted lines or streaks, it often means dirty corona wires, a scratched imaging drum, or debris caught in the paper path. First, carefully clean the corona wire using a cotton swab dipped in a little isopropyl alcohol. Also, check inside for paper bits or toner spills. Give the imaging drum a gentle inspection—any visible scratches usually mean it’s replacement time.
Fading or Light Prints: Prints that look faint or washed out typically point to low toner levels or an uneven toner distribution. Double-check your toner cartridge and replace it if it’s low. If it still has plenty, give it a gentle rocking to even out the toner distribution. If the problem continues, it might be time to change the imaging drum.
Ghosting (Faint Repeated Images): Ghost prints aren’t spooky—they’re just frustrating. This issue usually indicates a worn imaging drum or a malfunctioning fuser unit. Check your imaging drum first; if it looks worn or shows clear signs of use, replace it. If the drum looks good, the fuser might be the culprit, needing professional attention or replacement.
Toner Smears or Smudges: Smudgy prints can mean your fuser unit isn’t heating properly, you’re using the wrong kind of paper, or there’s toner spillage inside the printer. Inspect the fuser unit as per manufacturer directions, making sure it’s clean and heating adequately. Always use recommended paper types, as poor quality paper can cause smearing. Lastly, a thorough internal cleaning of spilled toner can often clear up smudges.
Blank Pages: Printing entirely blank sheets isn’t very productive! Usually, this happens when the toner cartridge is empty or still has sealing tape attached. Confirm your toner cartridge has toner and remove any sealing tape carefully. If these aren’t the issues, your imaging drum could have failed, needing inspection or replacement.
Spots or Specks: Small dots or specks scattered on the page usually come from contaminated toner, dirty rollers, or excess paper dust. Switching to a fresh toner cartridge often solves this. Also, be sure to clean your rollers and paper path regularly to remove built-up debris.
We once had a client whose marketing team was pulling their hair out over persistent ghosting issues. After running through our troubleshooting steps together, we finded that although the toner cartridge was relatively new, the imaging drum was past its prime. Replacing the drum made the ghosting completely vanish (pun fully intended).
For additional guidance, check out this helpful resource from HP on resolving ink cartridge issues.
Resolving Paper Feed and Jam Issues
Nothing disrupts workflow like the dreaded paper jam. Here’s how to quickly diagnose and fix common paper feed issues:
Paper Jams: Most often, paper jams are caused by dirty rollers, worn separation pads, incorrect paper loading, or paper dust buildup. Turn the printer off, unplug it, and let it cool for at least an hour. Gently remove all visibly jammed paper, pulling it slowly in the direction of the paper path. Check carefully for any tiny torn pieces and remove those, too. Clean the paper feed rollers with a slightly damp cloth (you can find a guide on cleaning paper feed rollers here), and check the separation pads for wear.
Multiple Sheets Feeding at Once: When your printer grabs a stack instead of one sheet, it usually means the separation pad is worn, there’s too much paper in the tray, or humidity is causing paper sheets to stick together. Replace the pad if it’s worn, keep trays from overloading, and fan the paper before loading—particularly in humid environments.
Paper Not Feeding: If the printer just won’t take paper, your tray might be empty (a classic Monday morning problem), or the pickup rollers could be dirty or worn down. Refill the tray, clean the rollers gently with a slightly damp cloth, and replace them if they look worn-out.
Paper Skewing or Misalignment: Crooked prints typically result from improperly adjusted paper guides, worn rollers, or bent paper. Adjust your tray guides snugly against the paper stack, inspect rollers for wear, and make sure you’re always loading smooth, undamaged paper.
Also, believe it or not, humidity can be a sneaky enemy of printer performance. Paper absorbs moisture easily, making it harder for your printer to separate sheets properly. Store paper supplies in a cool, dry place, use a dehumidifier if necessary, and fan paper beforehand in high humidity conditions. Small habits like these can keep your printer humming along without unexpected jams.
When we helped a busy office in Daytona Beach implement our laser printer maintenance checklist, we included tips for humidity control and regular roller cleaning. Soon after, their frequent jamming problems practically disappeared.
For even more helpful advice on keeping your business equipment working reliably, you can read up on cleaning your scanners and multifunction devices.
Consistency is key. Taking care of small issues promptly helps prevent bigger headaches down the line. If troubleshooting doesn’t resolve your printer problems quickly, don’t hesitate to reach out to our expert team at Smart Technologies of Florida—we’re here to help!
Frequently Asked Questions about Laser Printer Maintenance
How Often Should I Clean My Laser Printer?
When it comes to cleaning your laser printer, there’s no one-size-fits-all schedule. Think of your printer like a car – how often you service it depends on how much you drive it and where you drive it.
Several factors influence how frequently your printer needs attention:
Usage volume plays a huge role. A busy accounting office printing hundreds of pages daily will need more frequent cleaning than a home office used occasionally for personal documents. High-volume printers might need monthly internal cleaning, while light-use printers might do fine with quarterly cleanings.
Environmental conditions matter tremendously. Is your printer in a dusty warehouse or a clean office space? One of our clients operates in a particularly dusty environment, and we found that switching from monthly to bi-weekly internal cleaning made a world of difference in reducing their printer issues.
Paper and toner quality also affect maintenance needs. Higher-quality supplies generally create less dust and debris, extending the time between cleanings.
As a practical guideline, here’s what we recommend to our clients:
- Daily: Quick visual checks and exterior wipe-downs (takes just seconds)
- Weekly: More thorough exterior cleaning and paper path inspection
- Monthly: Internal cleaning of accessible components
- Quarterly: Deep cleaning and component inspection
- Annually: Professional servicing and preventive part replacement
Most manufacturers recommend cleaning internal components every six months or after about 300 hours of operation. However, this is just a starting point. We’ve helped many Florida businesses develop a customized laser printer maintenance checklist that fits their specific needs and environment.
What Causes Most Laser Printer Failures?
In our 23 years of experience at Smart Technologies of Florida, we’ve seen thousands of printer failures. The surprising truth? Most weren’t due to mechanical breakdowns but rather to preventable issues.
Lack of regular maintenance tops the list of failure causes. Just like your car will eventually break down without oil changes, your printer will develop problems when dust, toner, and paper debris accumulate inside. This buildup affects moving parts, optical sensors, and electrical contacts.
Poor quality supplies rank second on the failure list. Those bargain-bin toner cartridges might seem like a good deal until they leak inside your printer or damage the imaging drum. Low-quality paper creates more dust and can cause feeding issues that strain mechanical components.
Environmental factors play a bigger role than most people realize. Excessive humidity can make paper stick together, while dry conditions increase static electricity that attracts dust. High temperatures can affect toner adhesion and electronic components.
Exceeding recommended duty cycles without proper maintenance is another common issue. Your printer has a monthly page limit for a reason – pushing beyond it without additional maintenance accelerates wear and tear.
Improper operation rounds out the top causes. Forcing jammed paper out incorrectly, using incompatible media types, or rough handling can damage delicate internal components.
As one printing expert wisely noted: “It’s probably not broken – you might be neglecting your machine.” This insight perfectly captures what we see daily. Most “broken” printers are simply maintenance-starved machines crying out for attention.
We’ve helped businesses reduce printer failure rates by up to 80% simply by implementing structured maintenance programs. The math is simple: regular maintenance costs far less than repairs or replacements.
When Should I Consider Replacing My Laser Printer Instead of Repairing It?
Even the most diligently maintained printer eventually reaches retirement age. The decision to repair or replace isn’t always straightforward, but there are clear signposts to guide you.
Repair costs exceeding 50% of replacement value is a strong indicator it’s time to shop for a new printer. When we provide repair quotes at Smart Technologies of Florida, we always include this comparison to help clients make informed decisions.
Parts availability becomes an issue with older models. Manufacturers typically support models for 5-7 years, after which finding genuine parts becomes challenging and expensive. When parts are scarce, it’s often a sign the industry has moved on.
Persistent performance issues despite proper maintenance suggest internal wear beyond economical repair. If print quality problems continue after following your laser printer maintenance checklist, the core components may be reaching end-of-life.
Rising operating costs signal diminishing returns on your investment. When toner consumption increases for the same output, or energy usage climbs, newer models with better efficiency might save money long-term.
Technology limitations become more apparent as newer features emerge. If your team spends significant time managing print jobs that newer models could handle automatically, the productivity gains might justify an upgrade.
Age beyond 7 years generally puts a printer in the replacement zone. Even well-maintained printers have mechanical components with finite lifespans. Electronic components also age, affecting reliability and performance.
We recommend conducting a simple cost-benefit analysis considering current repair costs, repair frequency, operational efficiency, energy consumption, and potential productivity gains from new features.
Sometimes the answer isn’t obvious, which is why our team at Smart Technologies of Florida offers printer assessments to help you make the best decision for your business needs. We’ve helped many clients determine when maintaining their current printer makes financial sense and when upgrading to newer technology offers better long-term value.
The cheapest option today isn’t always the most economical choice over time. A thoughtful analysis of your specific situation will reveal the most cost-effective path forward.
Conclusion
Implementing a comprehensive laser printer maintenance checklist is one of the most effective ways to protect your investment in office equipment. When you take good care of your printers, they take good care of your business – it’s that simple. I’ve seen how proper maintenance transforms printer performance and longevity.
Regular maintenance does more than just extend the life of your printers beyond the typical 3-7 year average. It ensures your documents always look professional with consistent print quality. It reduces those frustrating moments when the printer decides to quit working during crucial deadlines. And perhaps most importantly for your bottom line, it saves your business significant money in the long run.
Think of your printer maintenance like caring for a car – ignore it, and you’ll end up stranded on the side of the road. But with regular attention, it’ll keep running smoothly for years to come.
The real magic happens when you follow a structured maintenance schedule. Daily quick checks take just seconds but catch issues early. Weekly and monthly tasks address developing problems before they cause downtime. Quarterly and annual maintenance ensures the deeper components stay in optimal condition. This layered approach creates a safety net that protects your equipment investment.
Using the proper tools and techniques makes all the difference. I remember one client who tried cleaning their printer with household glass cleaner – it nearly destroyed the optical sensors! Having dedicated lint-free cloths, isopropyl alcohol, and the right cleaning tools ensures you’re helping, not harming, those sensitive components.
Pay attention to your printer’s warning signs. That occasional paper jam might seem like a minor annoyance, but it could signal developing roller issues. Those faint streaks appearing on your documents? They’re your printer’s way of asking for corona wire cleaning. Listen to what your printer is telling you, and you’ll prevent major headaches down the road.
While many maintenance procedures are perfect for in-house handling, don’t hesitate to bring in professionals for the complex stuff. At Smart Technologies of Florida, we often help clients with the deeper annual maintenance that requires specialized knowledge and tools. This partnership approach gives you both cost savings and peace of mind.
For 23 years, we’ve been helping businesses in Daytona Beach and throughout Florida optimize their technology investments through people-centric solutions. What makes our approach different is that we focus not just on the equipment, but on how it supports your unique business goals and workflow. Your printer isn’t just a machine – it’s a crucial tool in your business success story.
Whether you’re managing a single office printer or coordinating a fleet of devices across multiple locations, a well-implemented laser printer maintenance checklist will help you stay ahead of issues and keep your business running smoothly.
For personalized assistance with your printer maintenance needs or to learn more about our comprehensive printer and copier services, contact our team today. We’re here to help you transform your approach to office technology through strategic maintenance and innovation.


