Why Brother Laser Printer Maintenance Matters for Your Business
Brother laser printer maintenance isn’t glamorous, but it’s key to smooth operations. Neglect your printer, and you’ll soon face streaks, smudges, jams, or worse—costly downtime.
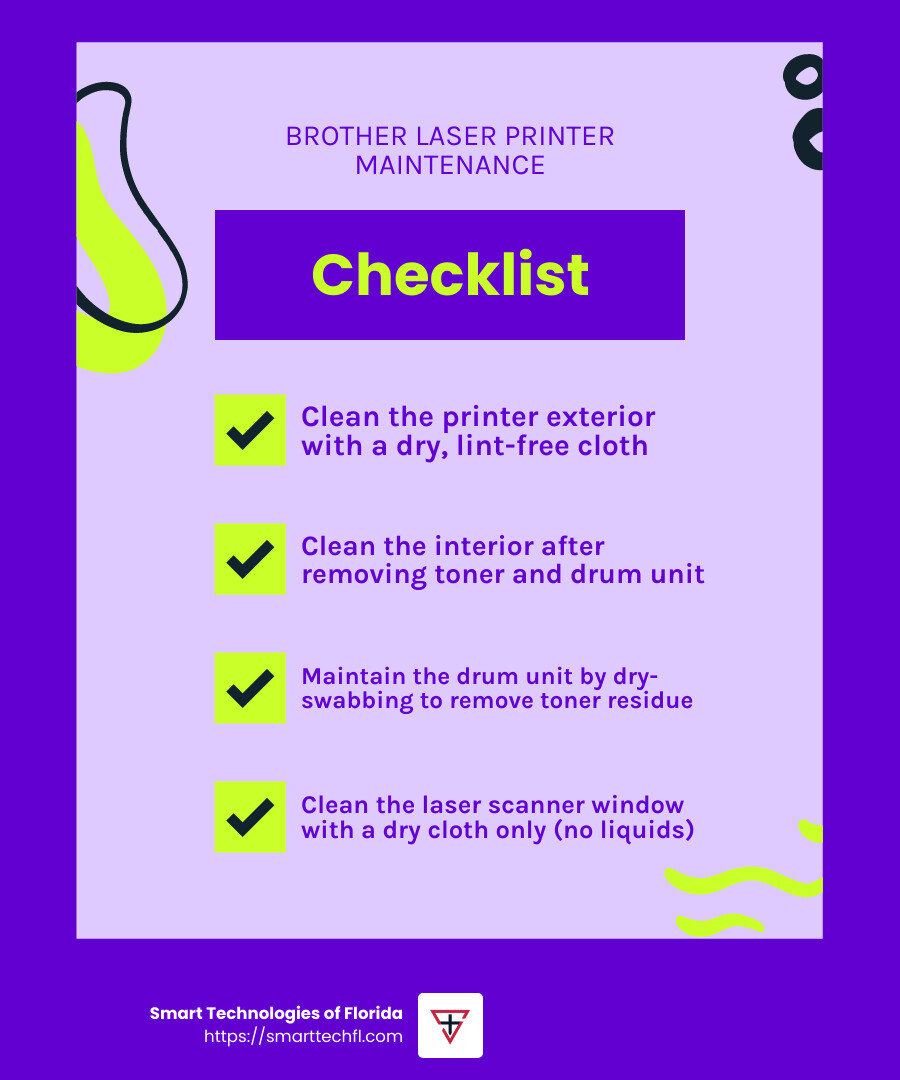
Here’s a quick, simple checklist to maintain your Brother printer effectively:
- Clean the Printer Exterior: Dust regularly with a dry, lint-free cloth.
- Clean Inside the Printer: Remove toner and drum unit, then wipe carefully with a dry cloth.
- Maintain the Drum Unit: Remove toner residue by gently dry-swabbing, no liquids.
- Clean the Laser Scanner Window: Use only a dry, lint-free cloth, no solvents or liquids.
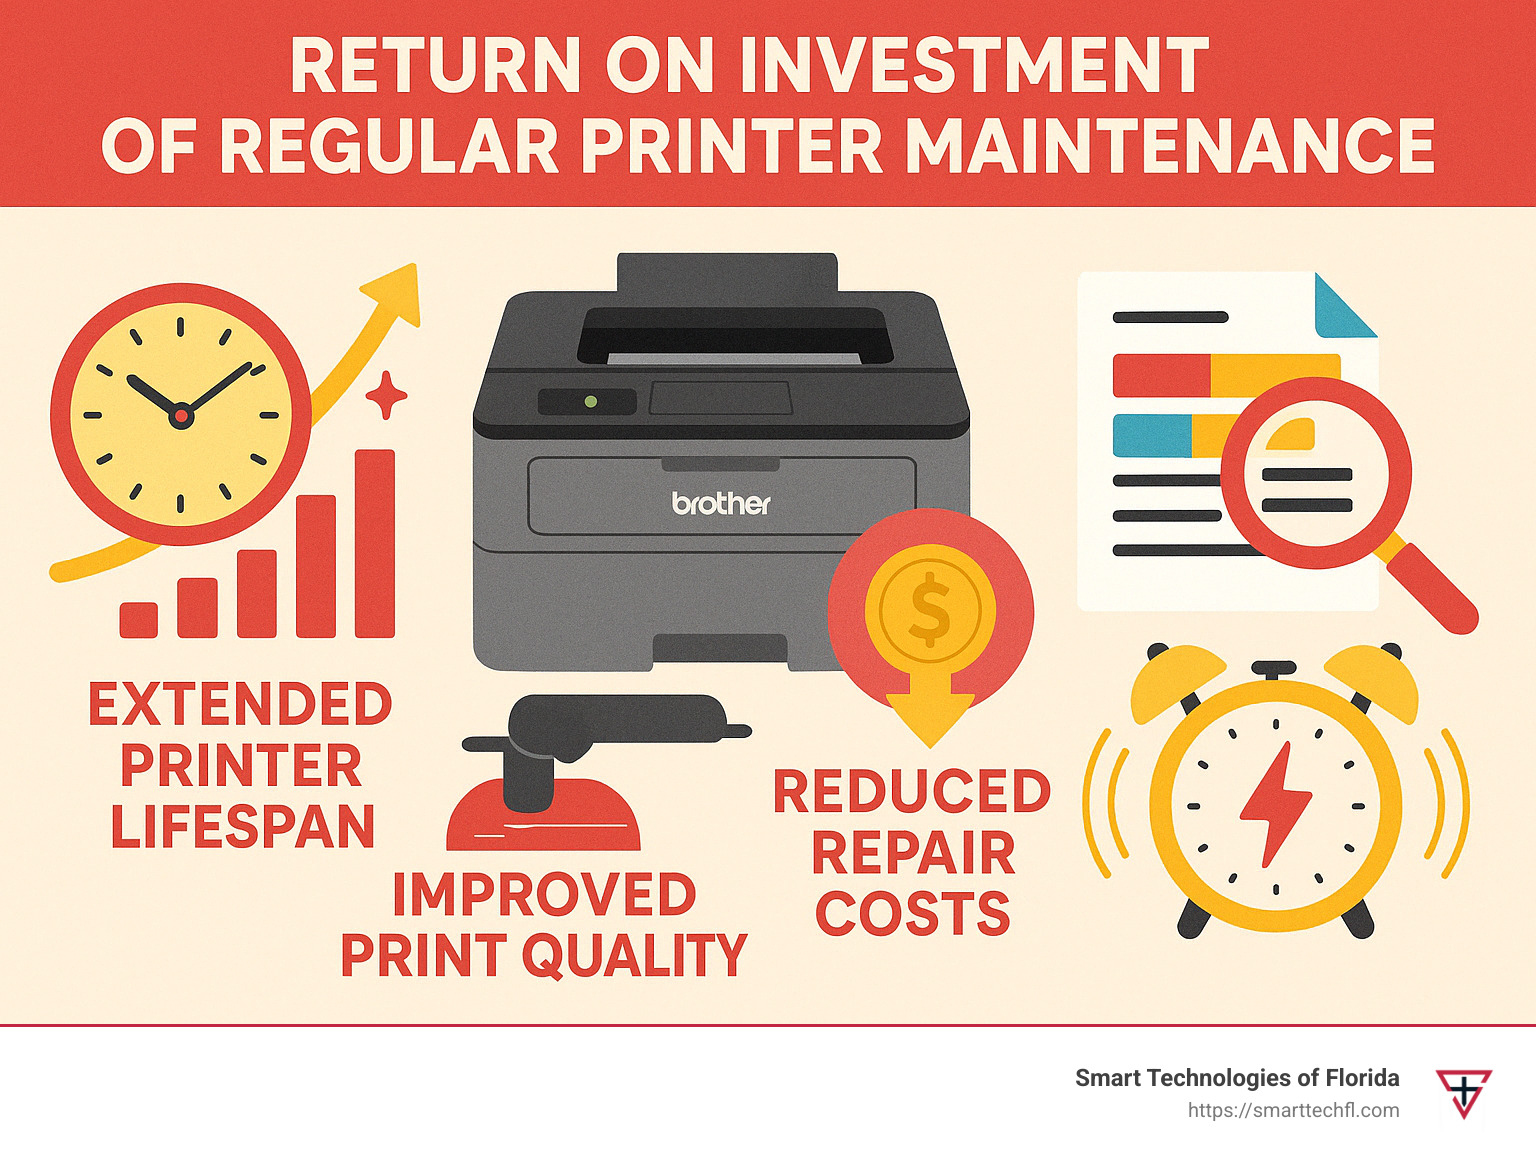
Regularly following these simple steps gives you:
- Clear, professional print quality.
- Longer printer life.
- Reduced downtime and repairs.
- Lower operating costs over time.
In other words, regular maintenance keeps your Brother laser printer—and your business—running smoothly.
Essential Steps for Brother Laser Printer Maintenance
Let’s face it – printer maintenance isn’t exactly the highlight of anyone’s day. But with a little care and the right approach, you can keep your Brother laser printer humming along beautifully for years. Think of it as giving your hardworking office assistant the TLC it deserves!
Cleaning the Exterior of Your Brother Laser Printer
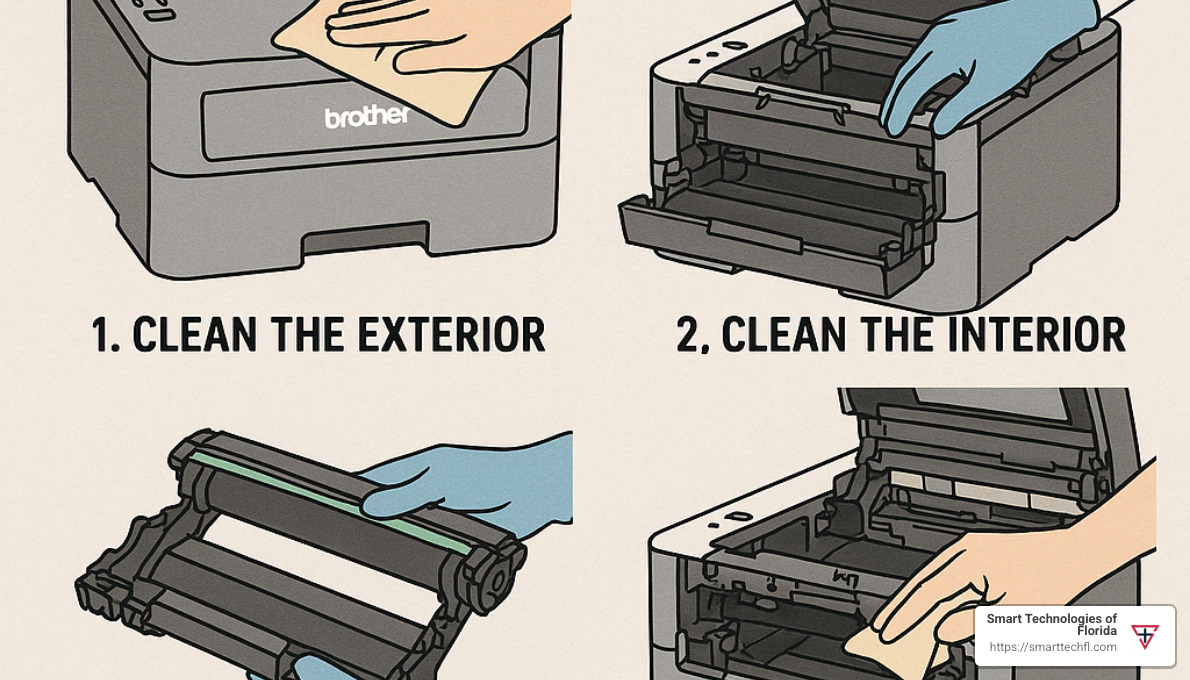
Your printer’s exterior is like its first line of defense against the office environment. Dust, paper bits, and coffee splashes (we’ve all been there!) can all find their way onto your printer’s surface.
Start by turning off and unplugging your printer – safety first! Then remove the paper tray completely to give yourself better access. Grab a soft, lint-free cloth and gently wipe down all exterior surfaces. Pay special attention to those vents and openings where dust loves to hide. Before sliding the paper tray back in, give it a good wipe-down too.
One important note: avoid using harsh chemicals like thinner, benzine, or ammonia-based cleaners. Your printer won’t thank you for that! For stubborn spots, a slightly damp cloth works wonders – but never spray liquid directly onto your printer. And always make sure everything’s completely dry before plugging it back in.
Cleaning the Interior of Your Brother Laser Printer
The inside of your printer is where the real magic happens – and also where toner dust and paper fibers can cause the most trouble. A clean interior means fewer paper jams and crisper prints.
Before diving in, power off your printer and unplug it. If it’s been working hard, give it about an hour to cool down – that fuser unit gets seriously hot! Open the front cover and carefully remove the drum unit and toner cartridge assembly. Place this on some disposable paper to catch any toner that might decide to make a break for it.
With a dry, lint-free cloth, gently wipe away any loose toner inside the printer. The paper path deserves special attention – it’s a hotspot for paper dust. The rollers that feed your paper through can benefit from a slightly damp cloth to remove built-up dirt that causes feeding issues.
As Brother’s technical support wisely notes, “We recommend placing the toner and drum assembly on a piece of paper in case toner is accidentally spilled or scattered.” Trust me, your carpet or desk will appreciate this precaution!
One thing to avoid at all costs: using compressed air inside your laser printer. It might seem like a quick fix, but it can blow toner into the air (not great for your lungs) and deeper into the printer where it can cause real damage.
Cleaning the Drum Unit
The drum unit is the unsung hero of your Brother laser printer maintenance routine. This component transfers toner onto paper, creating the images and text you see. When it’s clean, your prints look sharp and professional. When it’s not… well, let’s just say those streaks and spots aren’t winning you any presentation points.
As one printer maintenance expert puts it, “Proper maintenance can substantially improve the life of most components, significantly reducing the cost of ownership.” This is especially true for the drum unit, which should outlast several toner cartridges when properly maintained.
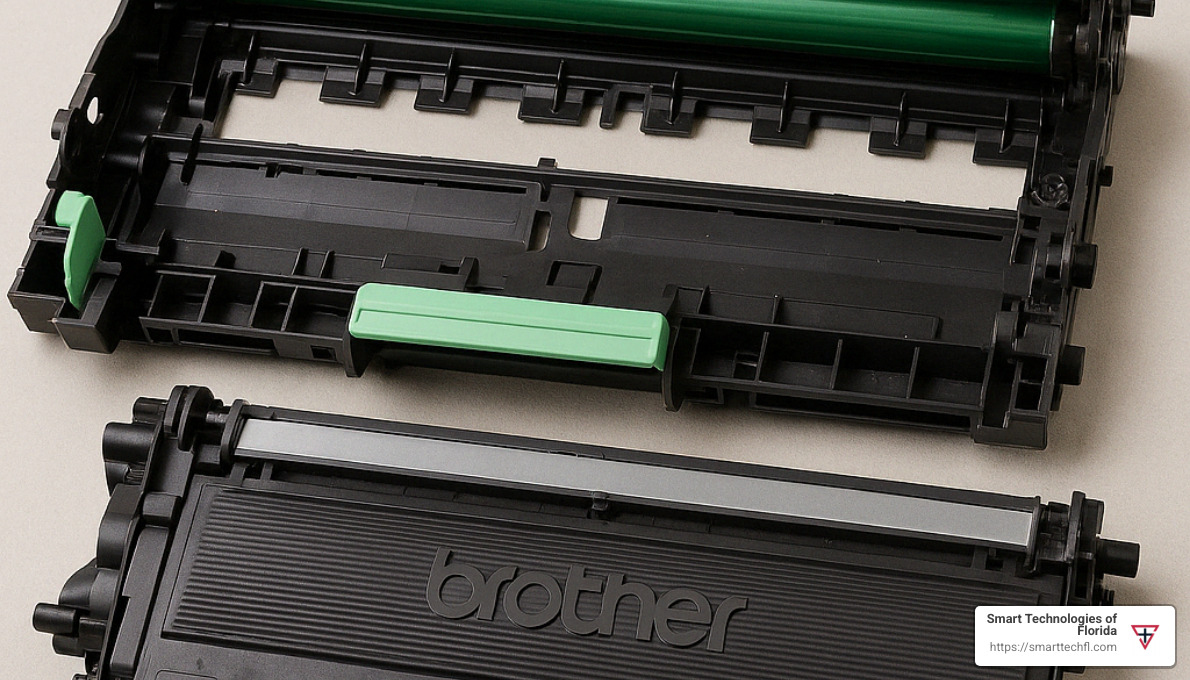
To clean it, first remove the toner cartridge from the drum unit by pressing down the green lock lever. Turn the drum unit so the gear is on the left side and take a moment to inspect the surface for any toner residue or debris. Using a clean, soft, lint-free cloth, gently dry-swab the drum surface.
For stubborn spots on the reddish-brown roller, you can use a cotton swab very lightly moistened with isopropyl alcohol – but only use gentle wiping motions. Rotate the drum using the white gear to clean the entire surface. Don’t forget to clean the corona wire by sliding the blue tab from side to side several times, and return it to its home position (usually marked with an arrow).
Handle this component with extra care – the drum surface is photosensitive and can be damaged by light, skin oils, or scratches. The green or blue photosensitive surface is especially delicate, so keep those fingers away!
Cleaning the Laser Scanner Window
The laser scanner window might be small, but it plays a huge role in your print quality. This little window directs the laser beam that creates images on the drum. When it’s dirty, those annoying white vertical lines start appearing on your documents.
To clean it, first locate the laser scanner window inside the printer after removing the drum unit and toner cartridge. Take a clean, soft, dry lint-free cloth and gently wipe the scanner window. Move the cloth in one direction to avoid just pushing debris around.
Here’s where I need to be absolutely clear: never use liquids of any kind on the laser scanner window. Brother explicitly warns, “DO NOT use isopropyl alcohol or any liquid to clean the glass.” Liquid and laser scanner windows mix about as well as cats and swimming pools – it’s just asking for trouble.
If those pesky white lines persist after cleaning, you might need a more thorough cleaning or there could be other issues at play. For model-specific instructions, check out Brother’s official guide on cleaning the laser scanner window.
With these simple maintenance steps, your Brother laser printer will reward you with crisp, clear prints and fewer frustrating interruptions to your workday. And remember, if you ever need professional assistance with your printer maintenance, our team at Smart Technologies of Florida is always here to help!
How Often Should You Perform Brother Laser Printer Maintenance?
Keeping your Brother laser printer in top shape means more than just occasional dusting—it requires consistent care based on how often you use it. But how frequently should you really be grabbing that lint-free cloth and giving your printer some attention?
The answer depends on your printer’s workload. For instance, if your printer sees light use (about 1–100 pages per week), then scheduling maintenance every three to four months should be enough to keep things running smoothly.
Businesses with moderate printer use (around 100–500 pages per week) should consider monthly maintenance. And for those hardworking printers tackling heavy use (500 pages or more per week), it’s wise to clean and inspect every week or at least every two weeks.
Brother’s own technical documentation recommends monthly cleaning, noting that regular maintenance can help resolve common printing issues like streaks, faded print, and annoying toner smudges. But don’t wait for your scheduled cleaning if you’re already seeing these problems. Addressing issues early can prevent bigger headaches down the road (and save you from embarrassing printouts in front of a client!).
Wondering how to tell if your printer needs a little TLC outside your regular schedule? Here are some clear signals:
- Spotting streaky, faded, or blotchy print quality means it’s time for an immediate check-up.
- Consistent paper jams or constant error messages usually indicate buildup or component wear.
- Hearing unexpected noises like grinding or squeaking suggests dirt or toner might be blocking smooth operation.
- Receiving frequent “toner low” notifications or experiencing slow printing speeds are signs to give your machine a thorough cleaning.
- Uneven print density (some areas darker or lighter than others) or persistent white vertical lines appearing on your pages typically indicate a dirty drum unit or laser scanner window.
Don’t forget, your printer’s environment plays a big role in determining how frequently you should perform Brother laser printer maintenance. Printers located in dusty workshops, warehouses, or offices with recycled paper (which generates more dust) typically require more frequent care. Similarly, humid or pollutant-heavy environments can also raise your maintenance needs.
At Smart Technologies of Florida, we’ve seen how regular care can extend a printer’s lifespan by years, saving businesses thousands in costly repairs or replacements. Establishing a simple yet consistent routine for your printer maintenance keeps your business running smoothly—without unexpected downtime or frustrating print issues.
Recognizing When to Replace Components and Seek Professional Assistance
Even with the most diligent Brother laser printer maintenance, some parts simply don’t last forever. Eventually, they’ll need replacing to keep your printer running at its best. Recognizing the signs early can save you time, money, and the frustration of dealing with poor-quality prints or printer downtime.
Signs It’s Time to Replace the Drum Unit
Your Brother printer’s drum unit is responsible for transferring toner onto your pages. While it’s built to last through multiple toner replacements, it won’t last indefinitely. So how do you know when it’s nearing the end?
A common sign is seeing regularly spaced dots or marks (roughly every 3.7 inches or 94mm) on your printed pages. You might also notice ghost images—faint copies of previous prints showing up on new pages—or consistent black vertical lines that don’t disappear even after thorough cleaning.
Sometimes, you’ll see a direct “Drum End of Life” message appearing on your printer’s display. Brother drum units typically last anywhere from 12,000 to 50,000 pages, depending on your printer model and usage. Once you begin noticing these signs or receive that drum replacement warning, it’s time to swap out the drum unit to avoid further print quality issues.
Signs It’s Time to Replace the Toner Cartridge
Replacing toner cartridges is a bit more routine, but knowing exactly when to do it keeps your prints looking sharp. Your printer usually gives you a friendly heads-up, displaying a “Toner Low” warning about 300 pages before the cartridge runs out completely. Don’t panic though; you can still print during this time, but print quality might gradually decline.
When you’re really running low, you’ll notice pages appearing increasingly faded, especially around the edges. Uneven density across pages and persistent white streaks are also clear indicators your toner cartridge is running out of juice. Another clue is noticing excessive toner dust inside your printer, suggesting a cartridge might be leaking—usually a good sign it’s time for a replacement.
Brother advises users not to push toner cartridges too far beyond the warning point, as running completely dry can potentially damage your drum unit and lead to costly repairs.
Monitoring Toner Levels
Keeping an eye on your toner levels helps you prepare and avoid unpleasant surprises. Thankfully, Brother makes it easy. Most Brother printers have built-in displays you can quickly check, or you can print a simple configuration or supplies status page right from the printer menu.
Brother’s printer software also includes handy toner-level monitoring, allowing you a quick glance from your computer. Some printer models even feature a convenient window for a visual inspection.
Regularly checking your toner levels is a small habit that makes a big difference in consistent print quality and avoiding downtime.
When to Seek Professional Assistance
Regular Brother laser printer maintenance keeps most issues at bay, but sometimes it’s best to call in the pros. If you’ve tried multiple cleanings and replaced components but still have persistent print quality issues, it’s time for an expert opinion.
Unusual printer behaviors, such as strange error codes popping up on the display, or hearing persistent grinding, squealing, or clicking noises during printing, also indicate the need for professional help.
Issues with the printer’s fuser unit (wrinkled pages, toner not sticking properly) and continuous connectivity problems that don’t resolve with updates or restarts require more technical know-how. Likewise, if you find yourself constantly battling paper jams even after thorough cleaning, professional servicing is your best bet.
Brother strongly recommends using authorized service centers for repairs. Certified technicians have the expertise and genuine Brother parts required to resolve tricky problems properly. At Smart Technologies of Florida, our experienced team provides reliable Brother laser printer servicing—getting your printer back into action quickly, saving you downtime and headaches.
For more advice on copier and printer issues, check out our helpful guide to Copy Machine Repair & Maintenance Tips. Knowing when to ask for help is just as important as regular maintenance in keeping your Brother printer—and your business—running smoothly.
Benefits of Using Genuine Brother Parts and Maintenance Kits
When it comes to Brother laser printer maintenance, you might be tempted to cut corners by choosing cheaper, third-party parts. After all, savings can be appealing! But here’s the catch: using genuine Brother parts and official maintenance kits offers clear, long-term advantages that outweigh short-term cost savings.
Ensuring Consistent Print Quality
Brother printers are carefully engineered to perform at their best with genuine Brother supplies. This isn’t just a marketing gimmick—it’s science. Genuine Brother toner cartridges are designed with precise specifications, ensuring they melt and bond perfectly with the paper at exact temperatures set by your printer. That’s why Brother strongly emphasizes using authentic drum units and toner cartridges.
Many users who switch back to genuine Brother supplies after trying third-party options notice immediate improvements in their print quality. Text becomes sharper and clearer, colors print accurately and consistently, and those frustrating streaks or smudges practically disappear. Simply put, genuine Brother parts mean consistently professional prints—every time.
Extended Device Longevity
Think of your Brother printer like a car. You can save money by using cheaper fuel or lower-quality parts—but at what cost? Genuine Brother components fit your printer perfectly and work exactly as intended. This precise compatibility reduces unnecessary wear and tear on your printer’s internal parts, helping avoid costly repairs down the road.
Using authentic supplies also means you’ll avoid potential damage caused by lower-quality, third-party materials. Non-genuine toner can leak or cause build-up inside your printer, leading to unexpected downtime and potentially voiding your warranty. By choosing genuine Brother parts, you’re protecting your printer investment and extending its lifespan—saving money in the long run.
Maintenance Kits: The Complete Solution
Brother’s official maintenance kits offer an all-in-one solution designed specifically for your printer model. These handy kits typically include essential components you’ll likely need to replace over time, such as the fuser unit, transfer roller, paper pickup rollers, and separation pads. Plus, they come with clear, step-by-step installation instructions, making it easy even if you’re not a tech wizard.
Unlike individually replacing worn parts only after they fail (often at inconvenient times), maintenance kits help you proactively address potential issues all at once, minimizing interruptions in your workflow. Brother printers even feature smart alerts that guide you, letting you know exactly when it’s time to install a maintenance kit. That means no guesswork and fewer unexpected breakdowns.
For businesses that depend heavily on their printing operations, investing in Brother’s genuine maintenance kits just makes sense. At Smart Technologies of Florida, we’ve noticed how clients who choose genuine supplies experience fewer printer issues and longer device lifespans. Plus, it feels good knowing you’re taking great care of your equipment!
Still curious about laser printer maintenance best practices? You can learn more by visiting this helpful resource: Laser Printer Maintenance—which highlights the importance of quality supplies and offers practical upkeep tips.
Frequently Asked Questions about Brother Laser Printer Maintenance
How can cleaning the drum unit improve print quality?
If your prints are starting to show streaks, smudges, or faded areas, the drum unit could be the culprit. This critical component transfers toner onto the paper, and when it gets dirty with toner dust or other particles, your print quality suffers.
By gently cleaning your drum unit, you’ll eliminate common issues like streaking and uneven print density. Regular maintenance ensures that toner spreads evenly across the page, resulting in crisp, clear text and graphics. Keeping your drum unit clean also prolongs its lifespan, saving your business money in the long run.
If your printer is color-capable, cleaning the drum unit will even help maintain accurate, vibrant colors. A little TLC every 3-4 months (or roughly every 5,000 pages) will keep your printer running smoothly. Of course, if you notice print quality slipping sooner, don’t wait—clean the drum unit immediately.
What are the recommended cleaning materials for different parts of the printer?
Choosing the right cleaning materials is key to effective Brother laser printer maintenance. Different parts of your printer require specific cleaning supplies to avoid accidental damage.
For the printer exterior, use a dry, lint-free cloth for regular dusting. If you spot stubborn dirt, a slightly damp cloth (water only, please!) can help. Avoid harsh cleaners like ammonia or solvents like benzine—they’re more likely to harm than help.
Inside your printer, use a soft, dry, lint-free cloth for general cleaning. If you need to get into tight spots, a soft paintbrush can help loosen dust. Skip the compressed air cans—they’ll blow toner dust deep inside the printer (and probably into your lungs—yuck!).
The drum unit itself is delicate. Always handle it carefully, using a dry, lint-free cloth to gently wipe away toner residue. If there are stubborn spots on the drum roller, a cotton swab lightly moistened with isopropyl alcohol will do the trick. Never touch the drum’s sensitive surface with your hands—your fingerprints are not welcome here!
The laser scanner window is extra-sensitive, so clean it only with a dry, lint-free cloth. Absolutely no liquids, not even alcohol, should come near this part. Paper towels or rough materials can scratch the surface, so stick to soft cloth only.
For the corona wire (the thin wire inside the drum unit), your printer likely comes with a built-in cleaner—a handy little tab you slide back and forth. If yours doesn’t have one, a dry cotton swab works great.
Lastly, paper rollers can benefit from a slightly damp cloth to remove built-up paper dust. Just be sure they’re completely dry before you reassemble everything—wet rollers can cause even more problems!
Keep a small maintenance kit handy with these basics, and your Brother printer will reward you with consistent, trouble-free printing.
How can I safely dispose of or recycle replaced printer parts?
Caring for your Brother laser printer also means responsibly handling old parts and cartridges to keep your office (and our planet) happy.
Used toner cartridges should be placed in their original bags (the ones your new cartridges came in) and sealed tightly to avoid leaks. Brother makes recycling easy with their free cartridge recycling program—just return your old cartridges to them. Many office supply stores also offer recycling programs, so check in your area.
When your drum unit reaches the end of its lifespan, package it carefully to protect it from light exposure and damage. You can return it through Brother’s recycling program or drop it off at local electronic recycling facilities. Some office supply shops even offer discounts when you recycle old drum units—always a bonus!
Other replaced parts, like maintenance kit pieces, typically fall under electronic waste (e-waste). Check with your local waste management or recycling centers for guidelines. These components often contain materials that shouldn’t end up in regular trash.
If you ever spill toner (hey, it happens), use cold water and a cloth to clean it up. Hot water sets toner stains permanently. For toner on clothing, wipe it off immediately with a dry cloth and then wash in cold water. Skip using a regular vacuum to clean up toner spills—it could cause a fire hazard.
Brother’s official advice is clear: handle toner carefully and responsibly. At Smart Technologies of Florida, we’re committed to eco-friendly practices and can help Daytona Beach-area businesses safely discard printer components whenever needed.
Conclusion
Taking care of your Brother laser printer may not be the most glamorous job in the office (it’s probably right up there with organizing the supply closet), but it absolutely pays off. Regular maintenance brings tangible benefits like sharper print quality, smoother operation, reduced downtime, and significant cost savings over the long haul.
By regularly cleaning both the exterior and interior parts of your printer, you’ll keep dust and debris from building up. This proactive approach prevents pesky jams, streaks, and smudges that inevitably pop up at the worst possible moment (usually five minutes before an important presentation).
Proper care of key components like the drum unit and laser scanner window directly impacts your printer’s output quality. A clean, well-maintained drum and scanner eliminate those annoying vertical lines or faded spots, giving you prints that look professional every time.
Sticking to a consistent maintenance schedule custom to your printing habits ensures your device is always running at peak performance. Additionally, recognizing when it’s time to replace the drum unit or toner cartridge helps you stay ahead of potential issues and avoid unnecessary wear and tear on other printer parts.
Using genuine Brother parts and official maintenance kits is crucial as well. While third-party options may seem tempting for short-term savings, investing in authentic Brother components ensures your printer remains reliable, produces consistent quality prints, and lasts longer—ultimately offering you the best long-term value.
At Smart Technologies of Florida, we’ve been helping businesses in the Daytona Beach area extend the lifespan of their printers and copiers for over 23 years. We understand your printer isn’t just a box spitting out paper—it’s a key tool that keeps your business running smoothly. After all, nobody ever said, “I love when my printer goes down during crunch time!”
If handling Brother laser printer maintenance yourself feels overwhelming or simply isn’t your cup of tea, don’t worry—we’ve got you covered. Our friendly, experienced technicians provide professional printer maintenance services customized to your specific needs. You can learn more about our comprehensive Printers and Copiers services and see how we can help keep your office equipment running smoothly.
Whether you choose to tackle printer maintenance on your own using this guide or decide you’d rather trust the pros, consistency is key. Giving your printer a little regular TLC will ensure it keeps providing the reliable performance your business depends on for years to come.


