Unboxing the Mystery of Laser Printer Maintenance Kits
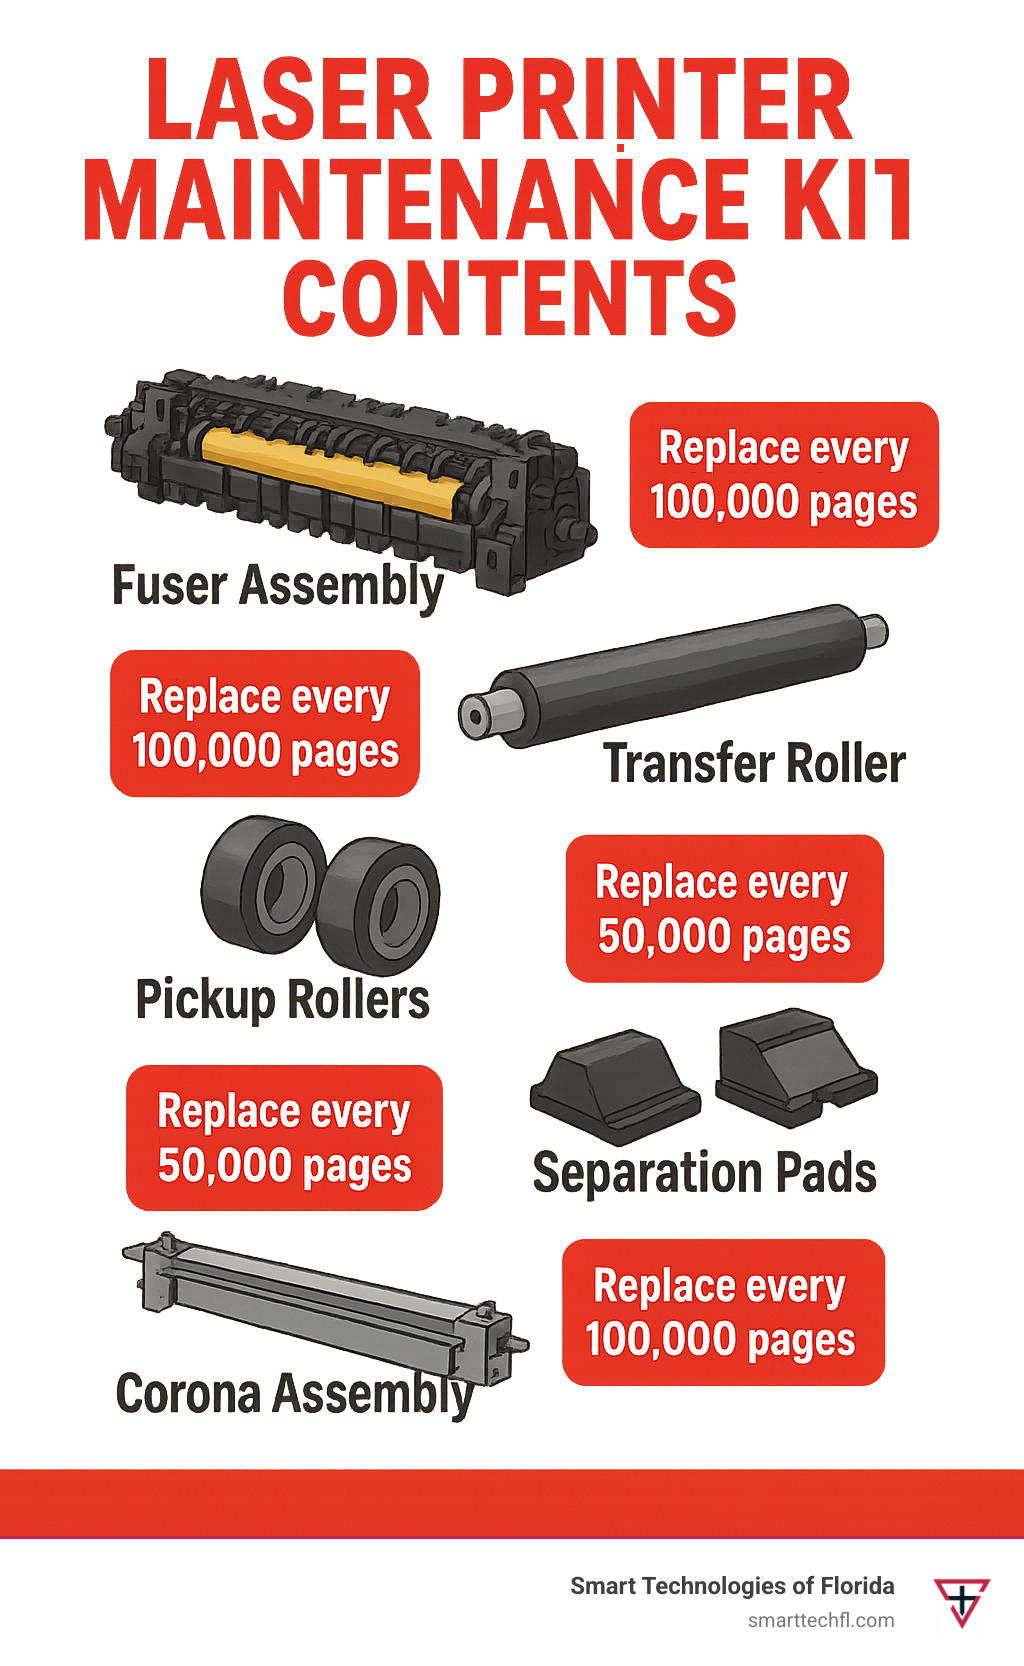
Laser printer maintenance kit contents typically include these critical replacement parts:
| Component | Function | Signs of Wear |
|---|---|---|
| Fuser Assembly | Melts toner onto paper | Streaking, faded prints |
| Transfer Roller | Applies static to attract toner | Light printing, white lines |
| Pickup Rollers | Feed paper into printer | Paper jams, misfeeds |
| Separation Pads | Prevents multiple sheets feeding | Double-feeding, jams |
| Corona Wire/Assembly | Charges paper and components | Uneven printing |
| Gloves | Protects hands during installation | N/A |
Proper maintenance is one of the hardest parts of working with print equipment. Even top-of-the-line laser printers suffer from jams and mechanical issues without regular care. That’s where maintenance kits come in – they contain all the components that naturally wear out after thousands of print cycles.
Most HP LaserJet maintenance kits include a fuser assembly, transfer roller, pickup rollers, and separation pads—these are the components most likely to wear out and cause print quality or paper handling issues. Replacing these worn parts with a maintenance kit can reduce paper jams and misfeeds by up to 80%, according to HP’s recommendations.
Think of a maintenance kit as preventative medicine for your printer. Just as you wouldn’t wait for your car’s engine to fail before changing the oil, you shouldn’t wait for complete printer failure before replacing worn components.
A typical HP LaserJet maintenance kit can extend your printer’s lifespan by up to 225,000 pages before the next kit is needed, depending on the model. This makes regular maintenance not just a technical necessity, but a smart business investment.
Reading This Guide in 60 Seconds
If you’re in a hurry, here’s what you need to know about laser printer maintenance kit contents:
- Maintenance kits contain parts that naturally wear out (fuser, rollers, pads)
- Replace kits every 100,000-225,000 pages depending on your printer model
- Kits can reduce paper jams by up to 80% and extend printer life
- Signs you need a kit: poor print quality, paper jams, error messages
- OEM kits are more reliable but costlier than third-party alternatives
- Installation requires care: power off, cool down, follow safety precautions
Jump to specific sections using these quick links:
- Why Maintenance Kits Matter
- Inside the Box
- Installation & Safety
- Troubleshooting
- FAQs
Why Laser Printer Maintenance Kits Matter
Picture this: It’s Monday morning, your team is frantically printing proposals for a client meeting in half an hour, when suddenly your reliable laser printer betrays you – spitting out pages with ghostly streaks or displaying a cryptic “fuser error” message. Sound familiar?
This scenario unfolds in offices throughout Daytona Beach and beyond every single day. The culprit? Neglected printer maintenance that only gets attention when something breaks.
“No printer will ever self-clean,” our technical team at Smart Technologies of Florida often reminds clients. “Human intervention is required to prevent downtime.”
The numbers tell a compelling story. A typical HP LaserJet maintenance kit can extend your printer’s lifespan by up to 225,000 pages. Simply replacing worn parts can reduce frustrating paper jams by up to 80%. And here’s a bonus for your utility bill – proper maintenance can reduce energy consumption by up to 21% on certain models.
But maintenance kits matter beyond just statistics. They address what The New Yorker famously called “the bane of office existence” – the dreaded paper jam. Despite decades of technological advancement, paper remains stubbornly imperfect. No two sheets are identical, and as they travel through your printer at impressive speeds, they interact with components that gradually wear down with each print job.
In our 23 years helping Florida businesses transform their operations, we’ve consistently seen that organizations with regular maintenance schedules experience significantly less downtime and far fewer printer-related headaches.
Symptoms Your Printer Is Begging for Maintenance
Your printer communicates its maintenance needs – if you know how to interpret the signals. Watch for these telltale signs that your laser printer maintenance kit contents need replacing:
Streaking or ghosting on printed pages happens when the fuser assembly wears out and can’t properly melt toner onto the page. Those mysterious lines or faint duplicate images aren’t random – they’re maintenance messages.
Frequent paper jams signal worn pickup rollers and separation pads that have lost their grip. One IT manager we worked with blamed “bad paper” for weeks before finding that worn rollers were actually causing the problem.
Strange noises during operation – those grinding, squeaking, or clunking sounds aren’t normal. They typically indicate mechanical parts reaching the end of their useful life.
Error messages appear because modern printers track page counts and will display warnings like “Perform Printer Maintenance” or specific codes related to components like the fuser assembly.
Faded print or uneven toner distribution occurs when the transfer roller wears out and can’t properly apply the static charge needed to attract toner to the page.
Replacement Intervals & Page Counts
So when should you replace your maintenance kit? It depends on your specific printer model, how you use it, and your office environment.
Most HP LaserJet maintenance kits are designed to last between 100,000 and 225,000 pages. The heavy-duty enterprise models like the HP LaserJet Enterprise MFP E6255XX and MFP M63X series can yield up to 225,000 pages per kit. The LaserJet MFP E626XX series pushes even further, reaching an impressive 247,000 pages.
These numbers assume ideal conditions, though. If your printer operates in a dusty environment or regularly handles specialty media like labels or envelopes, components may wear out faster. Conversely, if your office primarily prints text documents with minimal toner coverage, your kit might exceed its specified lifespan.
“We’ve found that monthly duty cycles are a better gauge than calendar time,” our maintenance team often explains. “A printer in a busy law office might need a kit every 6 months, while the same model in a small retail shop might go 2-3 years between replacements.”
Thankfully, modern laser printers track page counts internally, making it easy to monitor usage. When you approach the recommended replacement threshold, most printers will display a maintenance alert – giving you time to order a kit before problems develop.
For more detailed guidance, check out our HP Laser Printer Maintenance Tips to keep your equipment running smoothly.
Laser Printer Maintenance Kit Contents: Inside the Box
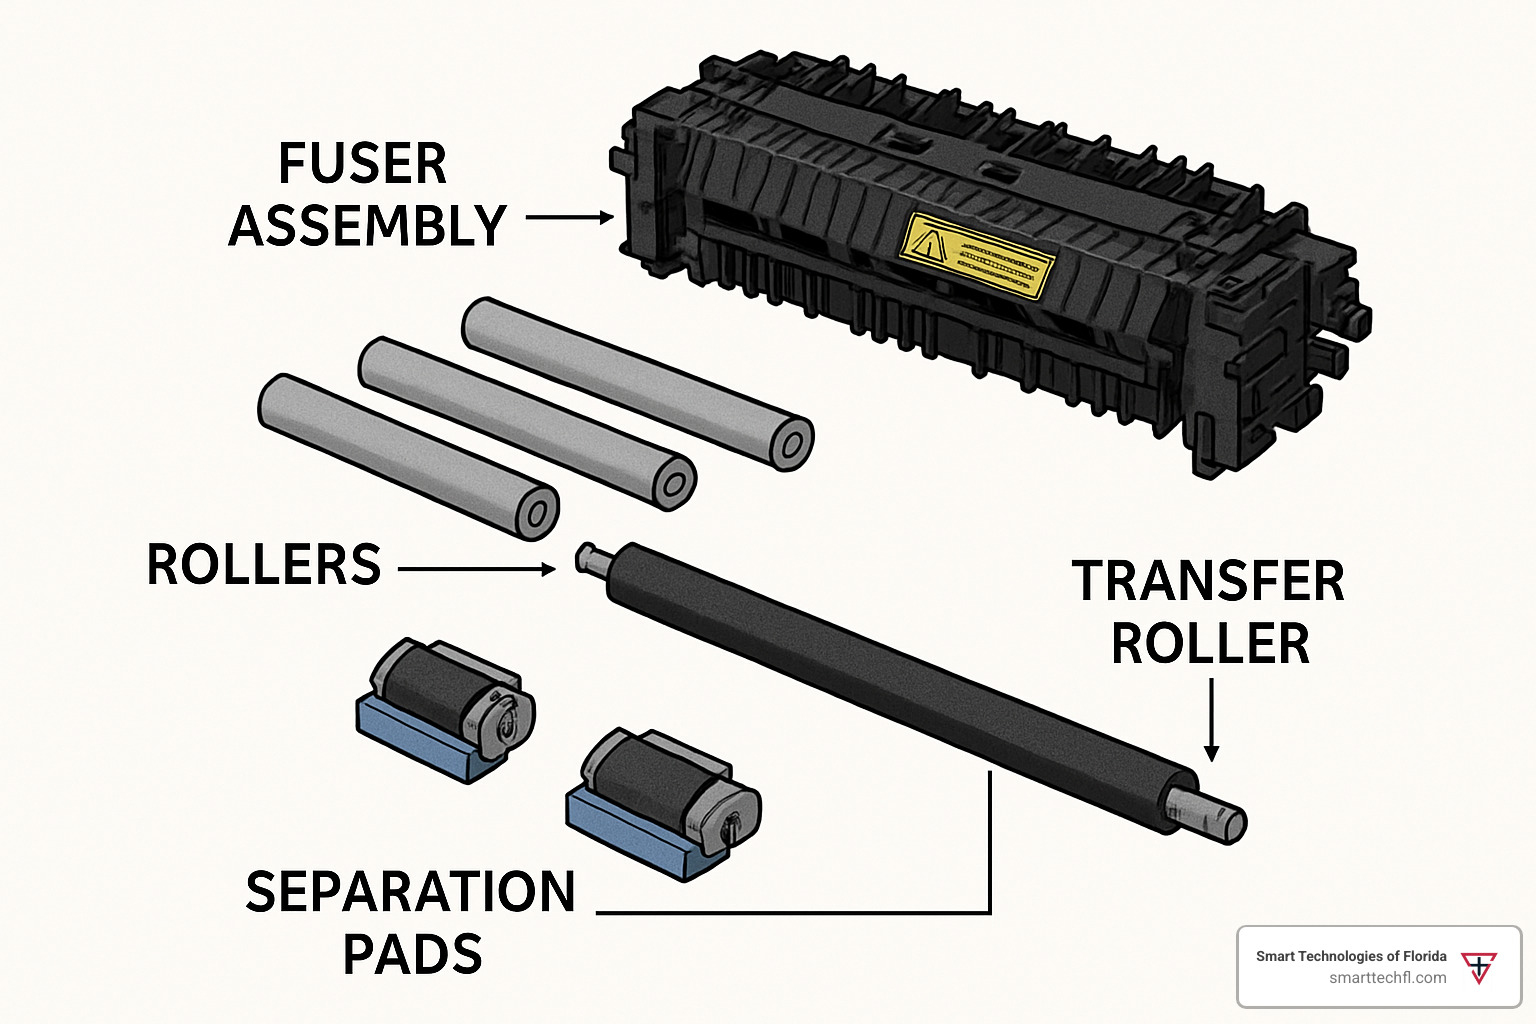
Let’s peek inside these mysterious maintenance kits. While the exact contents vary by printer model, most laser printer maintenance kit contents include several key components designed to replace the parts that naturally wear out during your printer’s life cycle.
What Makes Up Laser Printer Maintenance Kit Contents?
Think of your printer maintenance kit as a spa day for your hardworking office companion. Each component plays a crucial role in keeping your prints looking crisp and your workday flowing smoothly.
The fuser assembly is truly the heart of the maintenance kit. This workhorse uses heat (typically over 200°C/392°F) and pressure to melt toner particles into the paper fibers. As one of our technicians likes to say, “The fuser is like your printer’s kitchen – it’s where the ‘cooking’ happens. Just like a well-used frying pan eventually loses its non-stick surface, a fuser’s film wears out after thousands of hot impressions.”
Your kit also includes a transfer roller, which applies a static charge to attract toner from the drum onto your paper. Without this crucial component working properly, you’ll end up with faded prints or mysterious white lines streaking across your documents.
The pickup rollers are the hands of your printer, grabbing paper from the tray and feeding it through. Made from special rubber compounds, these rollers provide the grip needed to move paper smoothly. Over time, they become smooth and slippery – like tires that have lost their tread.
Working alongside the pickup rollers are the separation pads. These unsung heroes ensure only one sheet feeds at a time. When they wear out, you’ll suddenly find your printer trying to pull multiple sheets through simultaneously – a recipe for paper jams.
Some kits also include a corona assembly that applies electrical charges to help toner adhere properly, and fan assemblies or filters that manage heat and filter out paper dust. Most quality kits include disposable gloves to protect your hands from toner and prevent oils from your skin contaminating sensitive components.
For example, the HP CE525-67901 110 VAC Maintenance Kit for LaserJet P3015 series includes a full complement of parts: separation pad for the 500-sheet cassette, tray pick-up roller, tray separation pad, pick-up and feed rollers for the 500-sheet cassette, transfer roller, and a 110 VAC fuser.
The premium kits we recommend at Smart Technologies of Florida often include bonus components like multipurpose tray separation pads or extra D-shaped pickup rollers that standard kits might omit.
Signs Each Part Is Worn Out
Your printer has a language of its own when it comes to asking for help. Learning to recognize these signals can save you from the frustration of complete printer failure.
When your fuser assembly is crying out for replacement, you’ll notice streaking or smudging on printed pages. The toner might wipe off easily because it hasn’t properly bonded to the paper. You might see wrinkled paper or repetitive marks at regular intervals. In severe cases, you’ll hear grinding noises or – most concerning – smell a burning odor during printing, which demands immediate attention.
Pickup roller problems announce themselves when paper fails to feed from the tray or multiple sheets feed at once. You might notice pages skewing or feeding at an angle. If you inspect the rollers, you’ll see visible glazing or hardening of the rubber surface, perhaps even cracks or flat spots.
Worn separation pads reveal themselves when your printer starts grabbing multiple sheets simultaneously. If you examine the pads, you’ll notice they’ve become smooth and polished, losing the friction surface that makes them effective. They might also appear thinner than when new.
When your transfer roller wears out, your prints become light or faded. You’ll see white lines or streaks running down the page, uneven toner distribution, or tiny white spots scattered throughout your documents.
I remember an accounting firm here in Daytona Beach that called us in a panic during tax season. They were mystified by faint horizontal lines appearing on their quarterly tax documents. They’d already replaced their toner cartridge, assuming that was the culprit. Our diagnostic revealed a worn transfer roller instead. After replacing their maintenance kit, their print quality returned to perfect condition just in time for their deadline.
Recognizing these early warning signs can be the difference between a simple maintenance procedure and an office-wide printing emergency at the worst possible moment.
Choosing, Installing & Maintaining Your Kit Safely
Picking the right maintenance kit for your printer is a bit like matchmaking – get it right, and you’ll enjoy a beautiful relationship with crisp, clear prints. Get it wrong, and… well, let’s just say office drama ensues.
Selection Criteria
First things first – you need to know exactly which printer you’re working with. Look for the model number on the front panel, in system settings, or playing hide-and-seek on the back of your printer. HP printer owners can simply print a configuration page by holding the “OK” or “Check” button for a few seconds – it’s like asking your printer to tell you about itself.
Voltage matters more than you might think. 110V kits are designed for North America and countries using 110-120V power, while 220V kits serve Europe, Asia, and regions using 220-240V standards. Using the wrong voltage isn’t just a mistake – it’s potentially a fiery one that could damage your printer and create safety hazards. We’ve seen this mistake too many times at Smart Technologies of Florida, and trust us, it’s not a fun call to make to your boss.
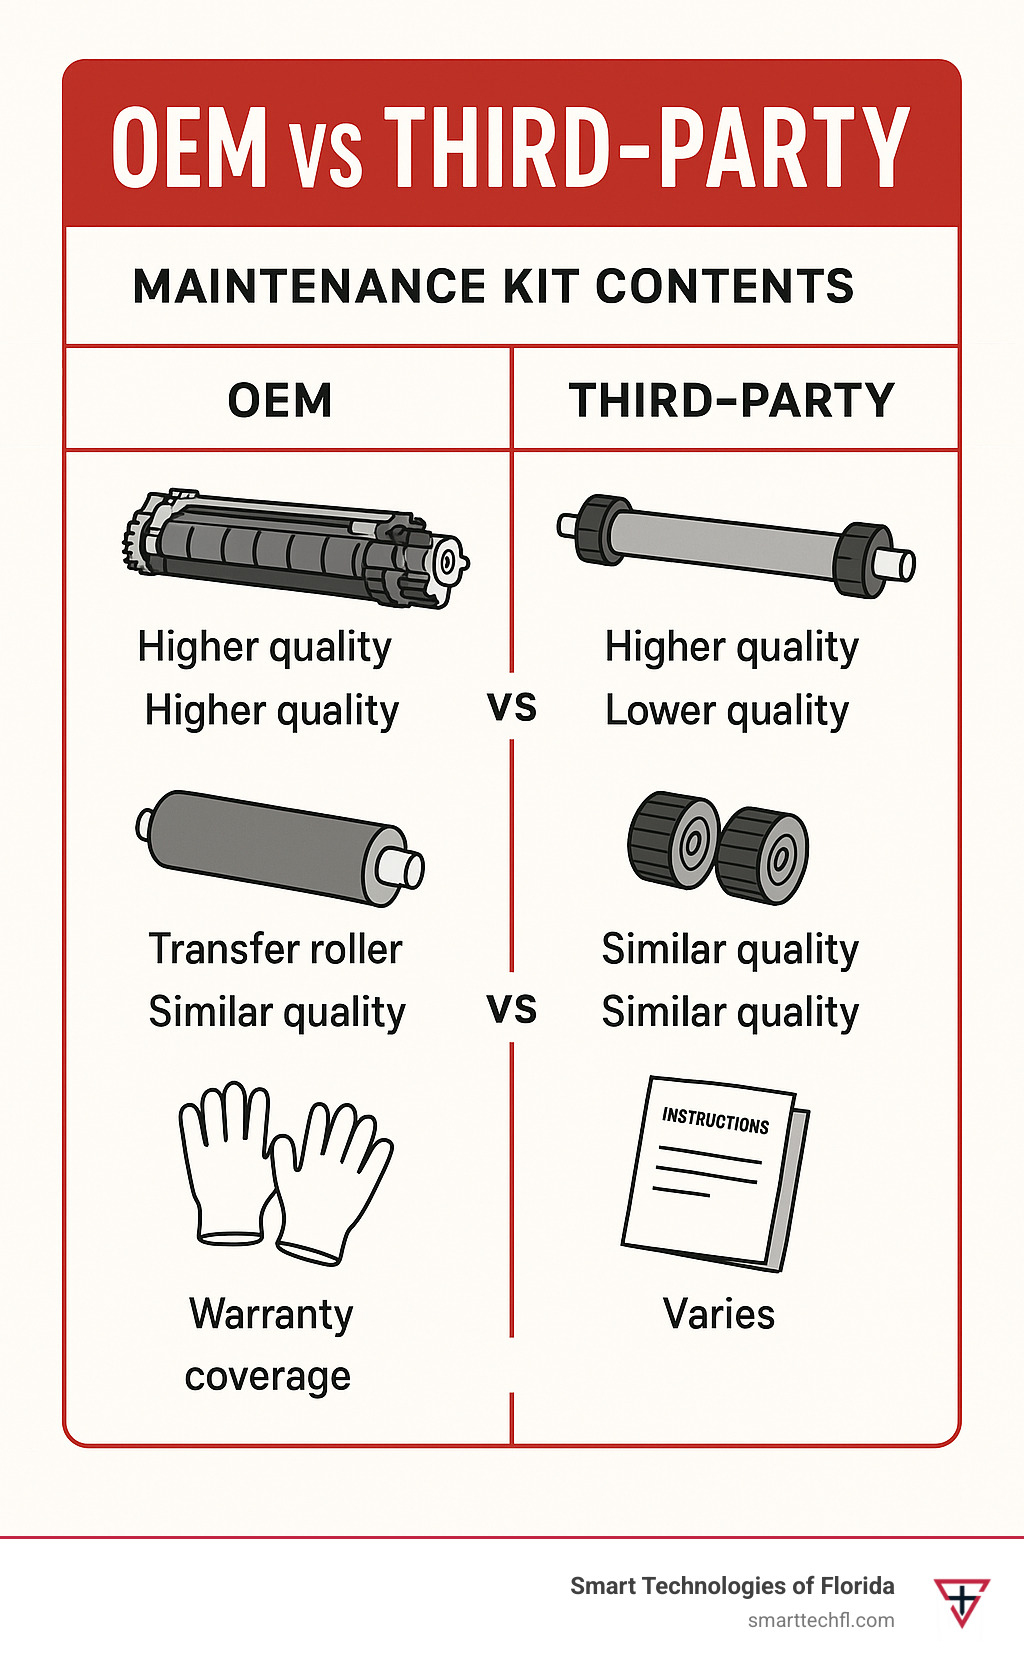
When it comes to choosing between genuine and third-party kits, you’re essentially deciding between peace of mind and saving a few dollars:
| Aspect | OEM Kits | Third-Party Kits |
|---|---|---|
| Compatibility | Guaranteed | May vary |
| Reliability | Extensively tested | Variable quality |
| Warranty | Maintains printer warranty | May void warranty |
| Support | Full manufacturer support | Limited or none |
| Cost | Higher | 20-50% lower |
Each printer model has its own specific maintenance kit part numbers – like a special code that open ups your printer’s extended life. For example, the HP LaserJet P3015 series uses CE525-67901 (110V), while the HP LaserJet Enterprise 700 Color MFP M775 uses CE514A (110V).
In our 23 years of experience helping Daytona Beach businesses transform their operations, we’ve found that genuine HP maintenance kits typically provide the most reliable performance for business-critical printers. They’re like insurance – they cost a bit more upfront but save you from those “printer down” emergencies that always seem to happen right before important meetings.
Installation Safety Precautions
Installing a laser printer maintenance kit contents is a bit like working on a car after a long drive – things are hot, and rushing can lead to burned fingers or worse. Follow these safety guidelines to keep both you and your printer happy:
Power down properly and wait at least 30 minutes for the fuser to cool. Those fusers operate at temperatures over 200°C (392°F) – hot enough to make a serious impression on both paper and fingers!
Protect yourself by wearing the gloves provided in the kit. Consider using a dust mask when handling toner components – toner particles aren’t something you want to invite into your lungs for an extended stay.
Electrostatic discharge is the silent killer of electronic components. Touch a grounded metal surface before handling internal parts, or use an anti-static wrist strap if you have one. Think of it as discharging your personal static before shaking hands with sensitive electronic components.
Most kits can be installed with minimal tools, but having a small Phillips screwdriver, a Torx T-10 driver, and tweezers nearby can save you from improvising with paperclips (we’ve seen it happen).
While your printer is open, it’s the perfect opportunity to clean accessible areas. Use isopropyl alcohol (not household cleaners) and lint-free cloths for gentle cleaning. A specialized toner vacuum is ideal, but never use a regular household vacuum – it can create static electricity and turn your office into a toner winter wonderland.
Installation Process Overview
While specific steps vary by printer model, here’s how the general process flows:
Start by printing a configuration page to record your current settings. Think of it as taking a “before” picture – it helps ensure everything goes back to normal afterward.
Follow your printer manual to open access panels and reach the components needing replacement. Modern printers are designed for serviceability, but they still have their secrets – the manual is your treasure map.
Carefully remove the old fuser assembly, transfer roller, pickup rollers, and separation pads according to the installation guide. These parts have been working hard for tens of thousands of pages – treat them with respect as they retire.
This is your chance to clean areas you normally can’t reach. Use a lint-free cloth slightly dampened with isopropyl alcohol. If you get toner on your skin, use cold water, not warm – warm water melts toner and creates a longer-lasting relationship than you probably wanted.
Install the new parts in reverse order, ensuring proper alignment and seating. It’s like a puzzle where all the pieces need to click satisfyingly into place.
After reassembly, run a test print to verify proper installation. There’s nothing more satisfying than seeing that first perfect page emerge after maintenance.
Don’t forget to reset the maintenance counter after installation. This typically involves a specific button sequence on the control panel or using the printer’s embedded web server. It’s like resetting the odometer after giving your printer a new lease on life.
For detailed, model-specific instructions, refer to the HP LaserJet guide or contact our team at Smart Technologies of Florida for assistance.

Proper Disposal of Old Parts
Being environmentally responsible with your old laser printer maintenance kit contents is the final step in the maintenance cycle:
Recycle the packaging – most kit packaging is recyclable cardboard and plastic. Mother Earth appreciates the gesture.
Participate in core return programs – many manufacturers and suppliers offer programs where you send back the old fuser for refurbishment. This not only helps the environment but can sometimes earn you a discount on future purchases.
Use proper e-waste channels for components that can’t be returned. These parts don’t belong in regular trash any more than your old smartphone does.
Contain any toner residue by keeping old parts in sealed bags. Toner has an uncanny ability to escape and find its way onto carpets, clothing, and mysteriously, always the lightest-colored surfaces in your office.
Here in Daytona Beach, we can help you identify local e-waste facilities that properly handle printer components – just another way we support our community’s sustainability efforts.
Troubleshooting Laser Printer Maintenance Kit Contents Problems
You’ve done everything right—purchased the correct kit, followed installation instructions carefully, and yet your printer is still giving you grief. Don’t worry, this happens even to the most experienced tech folks. Let’s walk through some common hiccups you might encounter after replacing your laser printer maintenance kit contents.
Installation Errors
Time you built furniture and had a mysterious “extra” screw left over? Printer maintenance can feel the same way sometimes.
If your printer displays a “Fuser Error” or “50.XX Error” after installation, take a deep breath. This usually means the fuser assembly isn’t seated properly. Power off your printer (safety first!), wait for it to cool down completely, and then check that the fuser is fully seated with its connectors properly engaged. It’s like making sure a puzzle piece is fully clicked into place—it might look right but needs that extra little push.
Experiencing paper jams right after your maintenance work can be particularly frustrating. Double-check that your pickup rollers are installed in the correct orientation. These rollers have a specific direction they need to face—installing them backward is an easy mistake to make but causes immediate paper feeding problems. Similarly, make sure your separation pads are properly aligned and seated.
Strange noises after installation? That grinding or clicking sound might be telling you something’s misaligned. Open the printer back up and verify that all components are properly seated according to your installation guide. Sometimes a gear or component gets slightly off-kilter during reassembly.
Firmware and Counter Issues
“I replaced everything, but my printer still says maintenance is required!” This common frustration usually means you need to reset the maintenance counter. Think of it as telling your printer, “Yes, I really did the maintenance work!”
For HP printers, this typically involves a specific button combination while powering on, followed by navigating through service menus. The exact procedure varies by model, so check your printer’s service manual or reach out to our team at Smart Technologies of Florida for guidance.
Some newer printers have become quite picky about the parts they accept. If your printer refuses to recognize new components, it might be looking for authentication chips found only in OEM parts. When using third-party components, you might need to update or downgrade firmware, or in some cases, switch to manufacturer-approved parts.
Print Quality Issues After Installation
If your prints are still showing streaks or faded areas after installing a new kit, several factors could be at play. First, ensure your transfer roller is making good contact—it needs to press firmly against other components to work properly. Next, verify the fuser is fully seated and connected. Many printers also have built-in calibration routines that can help optimize performance with new components.
Wrinkled paper after printing often indicates uneven pressure from the fuser. Check that it’s properly aligned according to your installation guide. Sometimes what seems like a minor misalignment can cause major paper handling issues.
One of our Daytona Beach clients called us in a panic when their newly maintained printer kept jamming repeatedly. Our technician finded the separation pad had been installed upside down—an easy mistake to make but one with frustrating consequences. After flipping it to the correct orientation, their printer handled another 200,000 pages without a hiccup.
Even seemingly small details matter in printer maintenance. A component that’s 99% correctly installed might still cause 100% of your printing problems. When in doubt, don’t hesitate to reach out to professionals who can help ensure your printer runs smoothly for thousands more pages.
Frequently Asked Questions about Laser Printer Maintenance Kit Contents
How often should I replace a kit?
Picture this: your trusty office printer has been churning out documents faithfully for months. But just like your car needs regular oil changes, your printer needs fresh components to keep running smoothly.
The sweet spot for replacement timing really depends on how hard you’re working your printer:
For those busy office printers that never seem to rest, replace your maintenance kit annually or when you hit the manufacturer’s page count (typically between 100,000-225,000 pages). These workhorses need regular care to maintain peak performance.
If your printer handles a moderate workload—the typical office scenario where it’s used regularly but not constantly—you’re looking at a 1-2 year replacement cycle. Watch for those telltale signs of wear like paper jams or declining print quality.
For the occasional printer that only springs to life for monthly reports or special projects, you can often stretch to 2-3 years between replacements. But don’t ignore quality issues when they appear—they’re your printer’s way of asking for help.
Your environment plays a huge role too. We’ve seen printers in dusty construction offices need maintenance twice as often as identical models in climate-controlled settings. Humidity, paper quality, and even air conditioning can affect how quickly components wear out.
Can using a kit void my warranty?
The short answer? It depends on what you install.
Using genuine manufacturer maintenance kits will keep your warranty intact and your service provider happy. These OEM kits are specifically designed for your printer model and come with the manufacturer’s seal of approval.
Third-party kits enter murkier territory. While they can save you money (sometimes 30-50% less than OEM kits), they might affect your warranty coverage if problems arise.
If your printer is still enjoying its warranty period, we recommend playing it safe with these steps:
Stick with OEM kits that match your exact printer model. Keep your receipts and maintenance records (a simple spreadsheet works wonders). Follow the installation instructions to the letter—no improvising!
For printers that have already graduated from their warranty period, third-party kits from reputable suppliers can be a budget-friendly alternative. Just be sure to read reviews and choose suppliers with solid return policies.
What do I do with old parts?
Those worn-out laser printer maintenance kit contents shouldn’t end up in the trash—they deserve a better retirement plan!
Many of our clients are surprised to learn about core return programs. These programs allow you to send back your old fuser assembly (often the most expensive component) for refurbishment. At Smart Technologies of Florida, we can help coordinate these returns, which sometimes even earn you a discount on future purchases.
The environmental impact of proper disposal is significant. Printer components contain materials that shouldn’t end up in landfills, including plastics, metals, and residual toner (which can contain potentially harmful compounds).
“One client brought in a box of old maintenance parts they’d been storing for years,” shares our service manager. “We were able to recycle nearly 95% of the materials, keeping them out of the landfill.”
For Daytona Beach businesses, we maintain an updated list of local e-waste facilities that properly handle printer components. Just give us a call, and we’ll point you to the nearest drop-off location.
Remember to keep used components in sealed bags—this prevents any residual toner from creating a mess (and trust us, toner spills are no fun to clean up!).
Can I replace individual components instead of the whole kit?
While it’s technically possible to replace just the squeaky roller or worn separation pad, there’s wisdom in the comprehensive approach of a full kit replacement.
Think of it like replacing just one tire on your car—it might solve the immediate problem, but the other three tires with similar mileage are likely to fail soon after. Printer components tend to wear at similar rates since they’re all handling the same paper load.
The economics rarely make sense either. By the time you factor in:
- The cost of ordering individual parts (often with separate shipping charges)
- The labor time for multiple separate replacements
- The downtime from multiple maintenance sessions
You’ll usually find that a single kit replacement is more cost-effective and certainly less disruptive to your workflow.
For businesses where printer downtime means lost productivity (or worse, lost customers), we strongly recommend the one-and-done approach of complete kit replacement. Your future self will thank you when you’re not troubleshooting a different component failure three weeks later!
What’s the difference between 110V and 220V maintenance kits?
This distinction is crucial and often overlooked until it’s too late. The main difference lies in the fuser assembly, which uses heat to bond toner to paper.
110V kits are designed for North American electrical systems and other regions using 110-120V power. 220V kits are built for Europe, most of Asia, and other regions operating on 220-240V electrical standards.
Installing the wrong voltage kit isn’t just ineffective—it can be dangerous. A 110V fuser in a 220V environment will likely burn out immediately and could pose a fire hazard. Conversely, a 220V fuser in a 110V environment won’t reach proper operating temperature, resulting in poor toner adhesion and smudged prints.
“We once had a client who ordered maintenance kits for their international offices without checking voltage standards,” recalls our support team. “Thankfully, we caught it before installation, saving them from potential equipment damage and lengthy downtime.”
Always verify your local voltage standard before ordering a maintenance kit. When in doubt, check the specifications on your current printer or consult with our team—we’re happy to help you identify the correct kit for your location.
Conclusion
Maintaining your laser printer doesn’t have to be mysterious or daunting. With a clear understanding of laser printer maintenance kit contents and proper installation procedures, you can extend your printer’s lifespan, reduce downtime, and maintain consistent print quality.
At Smart Technologies of Florida, we’ve spent 23 years helping businesses in Daytona Beach and beyond transform their operations through people-centric technology solutions. We’ve seen how a well-maintained printer can be the unsung hero of a productive office – quietly doing its job day after day without complaint.
Think about it: your printer touches almost every aspect of your business. From contracts and proposals to marketing materials and internal communications, it’s the bridge between your digital and physical worlds. That’s why regular maintenance isn’t just a technical necessity – it’s a business essential.
By replacing worn components before they fail completely, you’re not just fixing a machine; you’re preventing the ripple effects of downtime. No more emergency runs to the copy shop. No more apologizing to clients for delayed documents. No more watching your team stand around a malfunctioning printer, wondering who’s going to break the news to IT.
What we love about maintenance kits is how empowering they can be. They put control back in your hands, letting you decide when maintenance happens – not when an unexpected breakdown forces your hand. It’s the difference between a planned 30-minute maintenance window and a full day of printer chaos.
Whether you’re managing a single printer or an entire fleet, understanding maintenance kits gives you the knowledge to make smarter decisions about your printing infrastructure. And on those occasions when you need a helping hand or expert advice, our team is always here to help with guidance custom to your specific situation.
Ready to take the next step in optimizing your printing infrastructure? Explore business-class printers & copiers that integrate seamlessly with your workflow, or reach out to discuss how Smart Technologies of Florida can support your business change journey.
Remember: in laser printers, an ounce of preventative maintenance is worth a pound of emergency repairs! Your future self (and your entire office) will thank you for taking the time to care for these essential business tools.


